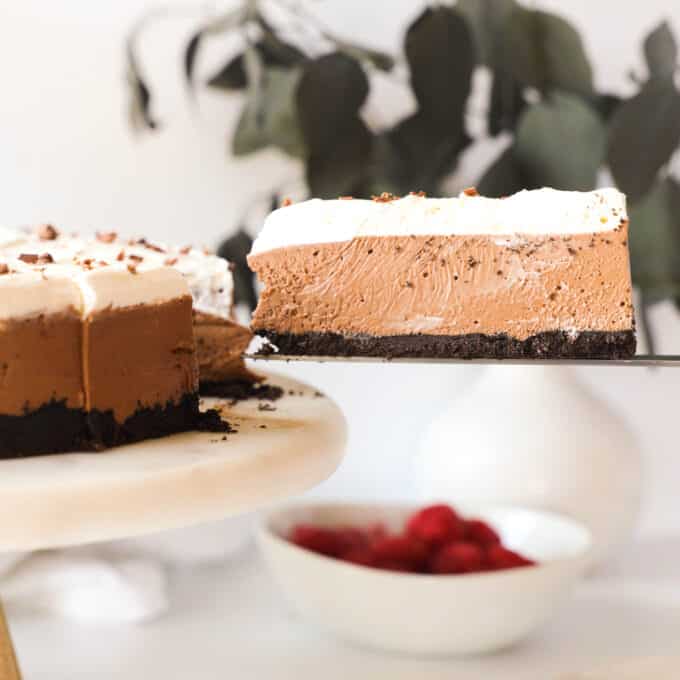
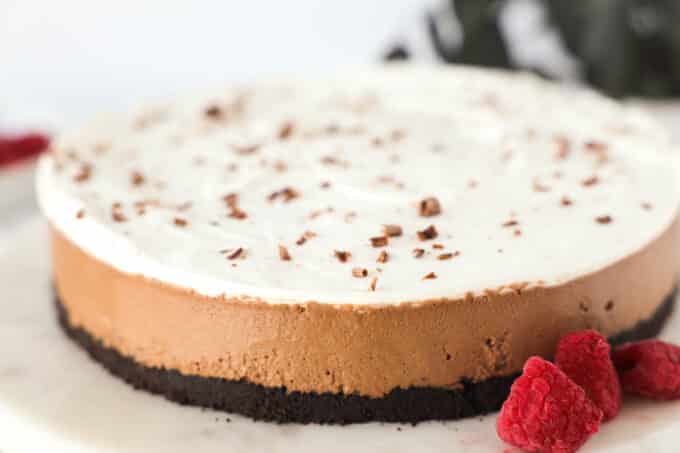
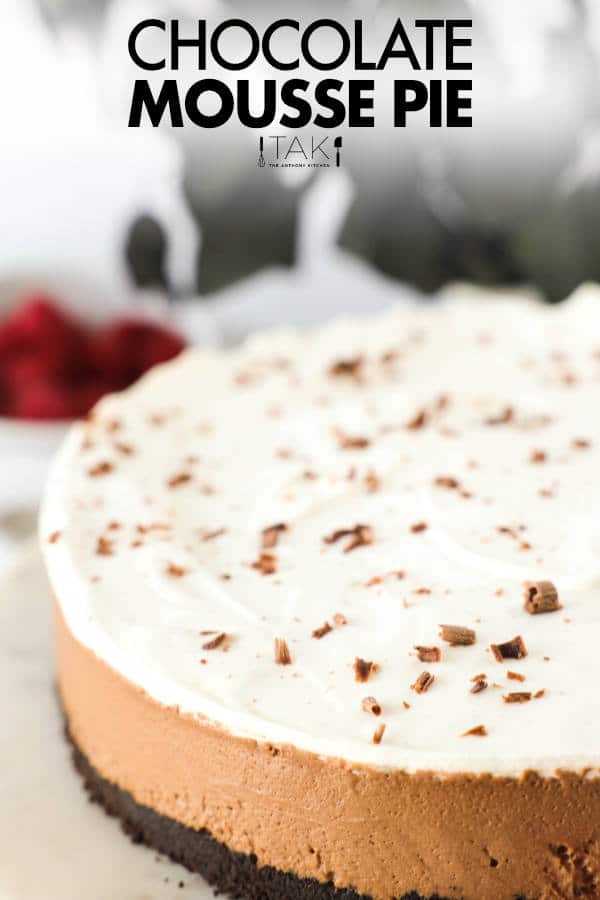
Put some posh on the holiday table with this gorgeous Chocolate Mousse Pie that tastes every bit as good as it looks. If you're looking for silky smooth, creamy, and decadent, with mass amounts of chocolate flavor, you've come to the right place. And that's just the mousse!

The Oreo crust and fluffy whipped cream topping are absolutely perfect for complementing the chocolate mousse. Not to mention, this recipe is easy enough for even the most beginner home chef. No double boiler, no whipping egg whites, and a lot of it comes together in the blender! And if you love this, we've got more decadent Chocolate Desserts for you to try!
Whip this up to wow the crowd at any holiday party or family gathering! Attending multiple celebrations this season? Try our Pumpkin Mousse, No-Bake Chocolate Pie, or No-Bake Peanut Butter Pie and we promise you won't be disappointed!
HOW TO MAKE CHOCOLATE MOUSSE PIE
The first thing you do is prepare your springform pan. You could also use a deep-dish, 9" pie plate if desired. You'll need to grease the pan, it's best to use nonstick cooking spray over butter for this recipe. Line the bottom of the pan with a parchment paper round and cut strips of parchment paper to line the edges. Set the pan aside, and move on to the Oreo cookie crust!
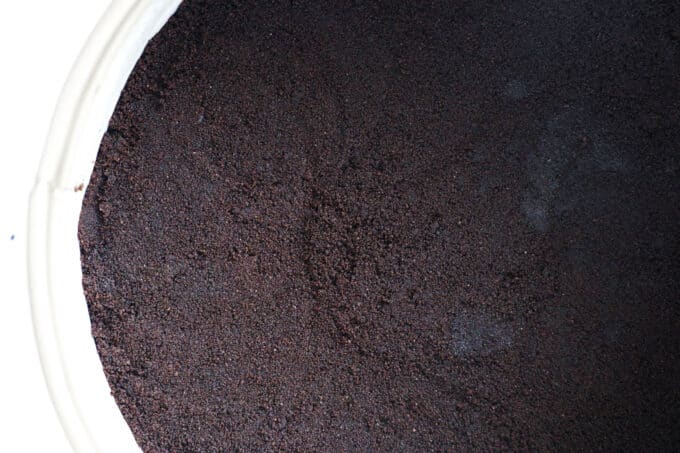
To make the cookie crust for your Chocolate Mousse Pie, add the Oreo cookies to a food processor fitted with a blade attachment. Make sure your Oreo cookies are whole, with the filling intact! Secure the lid and process the cookies until they have turned into fine crumbs. Then, slowly drizzle the melted butter through the feed tube, and pulse until the cookies appeared dampened throughout.

If you do not have a food processor, place your Oreo cookies in a gallon size zip top bag, and use either a kitchen mallet or a rolling pin to crush them. Then, you can transfer them into a medium bowl, drizzle in the melted butter, and stir until dampened. Your crust is ready to go once you can squeeze the mix in your hand and it holds together in a clump.
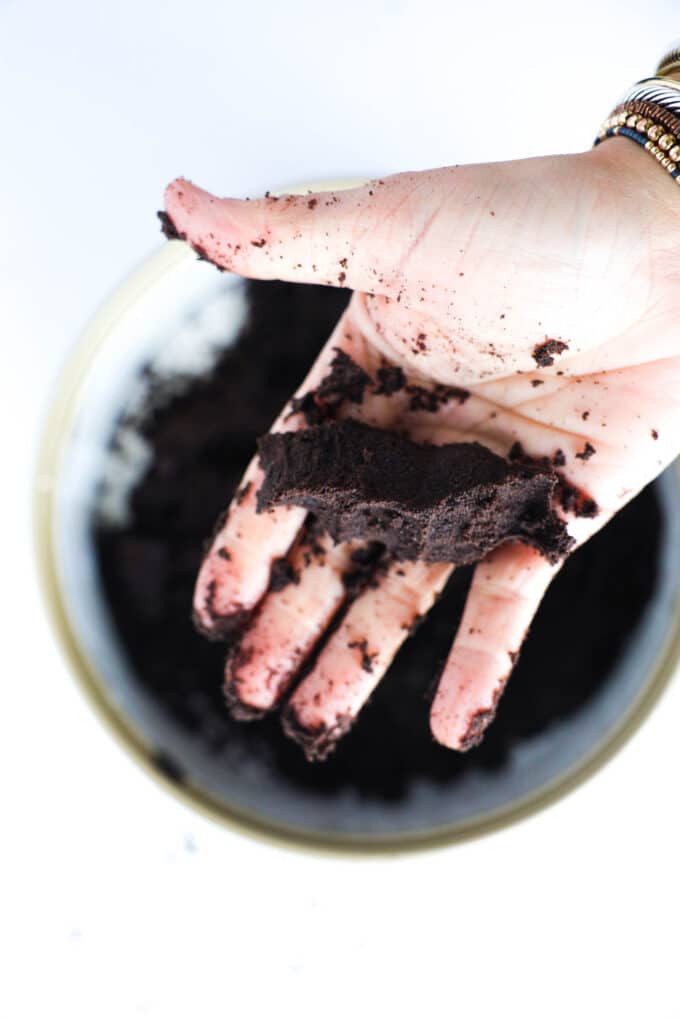
Add the Oreo crust to the prepared pan and press down firmly, spreading the crust across the bottom of the pan. You can use the bottom of a glass to help compact your cookie crust! Transfer the pan to the refrigerator while you prepare the rest of your Chocolate Mousse Pie.
Now, we get to move on to the mousse! The mousse begins with simple syrup. For this, you will need to combine granulated sugar and water in a small saucepan over medium heat. Stir often, and as soon as the water begins to boil and the sugar dissolves, your simple syrup is ready.

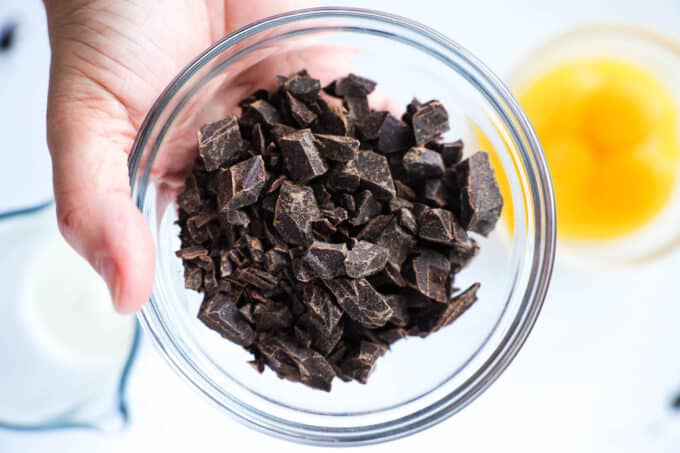
Now, we will move over to the blender! Add finely chopped semi-sweet or bitter-sweet chocolate, room-temperature egg yolks, heavy whipping cream (that has been slightly warmed), and salt to your blender. Blend on medium speed until the chocolate is broken, about 30 seconds.
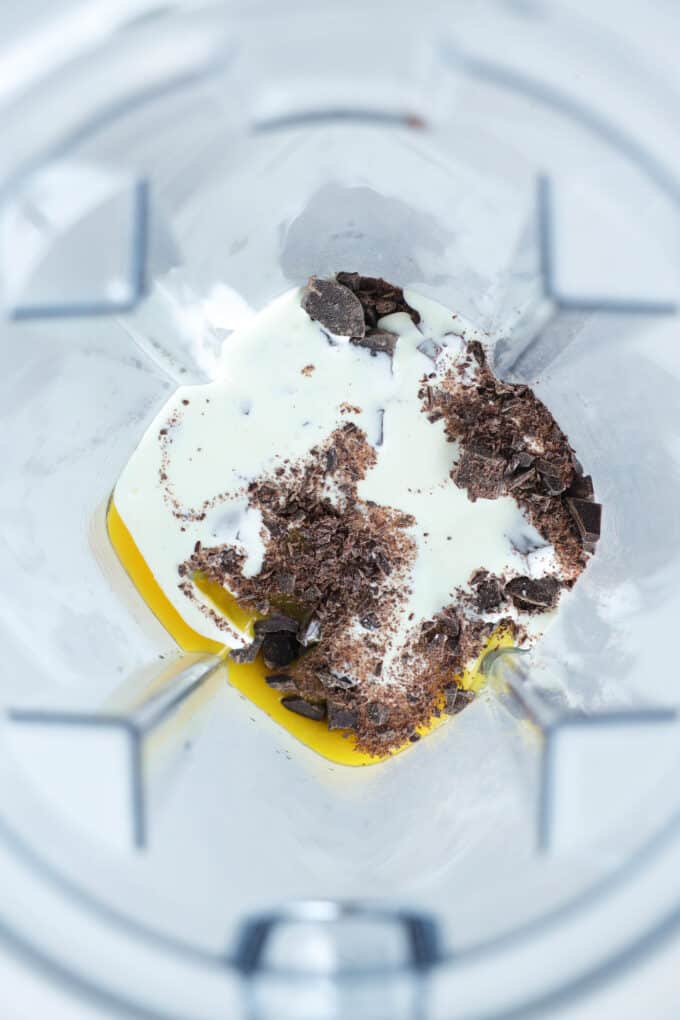
A quick word on chocolate: You might've noticed you have options to use semi-sweet chocolate or bittersweet chocolate for this Chocolate Mousse Pie recipe. If you like a deeper, darker chocolate flavor, you want to go with the bitter-sweet over semi-sweet. You can also use chocolate chips in place of chopped chocolate. However, do not use Nestlé toll House chocolate chips. They do not melt down well. Our recommendation for chocolate chips would be Guittard.
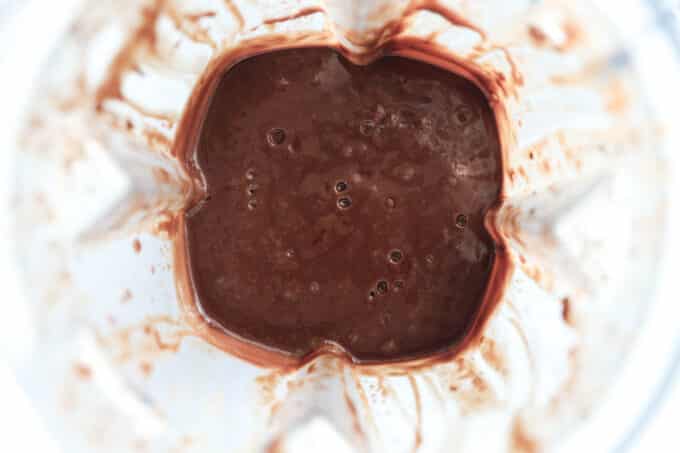
At this point, you will remove the center blender cup (not the entire blender lid), and start slowly and carefully drizzling in your simple syrup in a very thin stream. Take care to stand back and use caution as you pour the syrup. Depending on the shape and vortex created within your blender, splatters can occur, and hot sugar can cause serious burns.
You will see the simple syrup begin to melt the chocolate, and the mixture will become very smooth. Continue blending on medium speed for about 3 to 4 minutes more. Now you will add the room temperature butter and vanilla extract, and blend once more until smooth. Set the blender aside for about 45 minutes, or until the mousse is completely cool to room temperature.
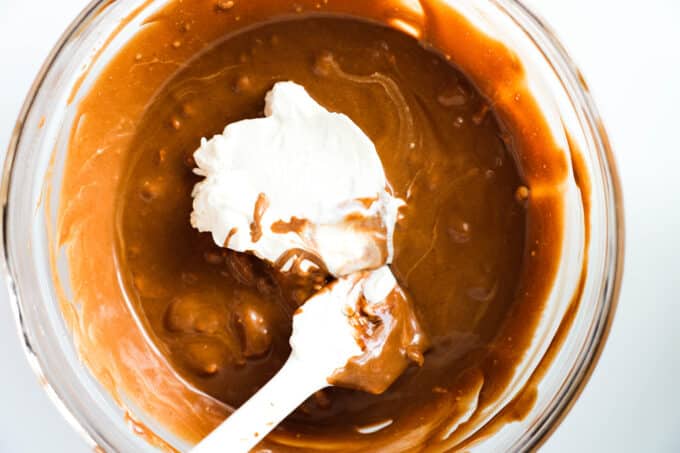
As soon as your chocolate mousse base is cooled and ready to work with, transfer it to a large bowl and begin on your whipped cream.
Add the cream to a medium-sized mixing bowl and use a handheld mixer on medium speed to whip until stiff peaks form.
Remove half of the whipped topping and transfer it to a small bowl. Add confectioners sugar, vanilla, and salt. Mix on low until the ingredients are combined, then cover it with plastic, and transfer it to the refrigerator. This is the whipped cream topping you will use to top off your Chocolate Mousse Pie!
Take the remaining, unsweetened whipped cream and add it to your cold chocolate mousse base in four separate additions, taking care to fold (not stir!) in the whipped cream!
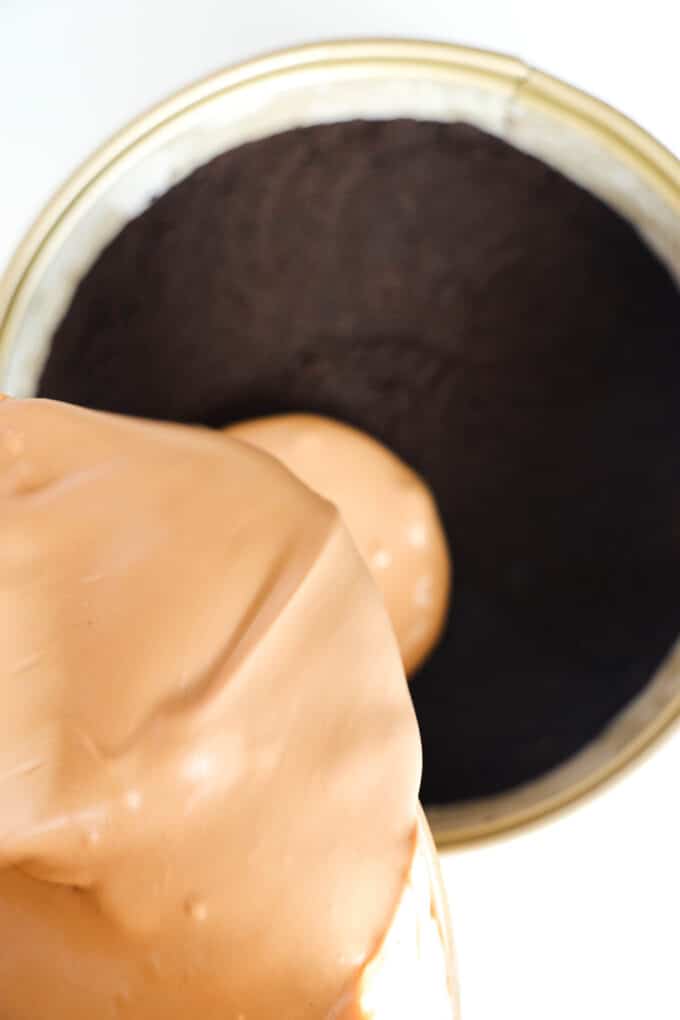
Pour the mousse over the prepared crust, and refrigerate for at least four hours but preferably overnight.
Once the mousse is set up, you can spread on the sweetened whipped cream topping and top it with chocolate shavings, if you'd like.
Remove the Chocolate Mousse Pie from the pan, discard of the parchment paper and serve! For more easy and delicious no-bake dishes, give our No-bake Recipes a try!
6 MORE PIE RECIPES YOU’LL LOVE
- Butterscotch Pie
- Kentucky Derby Pie
- Sweet Potato Pie
- Chocolate Chess Pie
- Classic Buttermilk Pie
- Apple Crisp Pie

Butterscotch Pie

Kentucky Derby Chocolate Bourbon Pecan Pie

Sweet Potato Pie

Chocolate Chess Pie

Classic Southern Buttermilk Pie Recipe
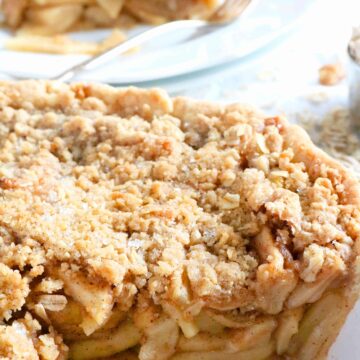
Apple Crisp Pie

Chocolate Mousse Pie
Ingredients
FOR THE CRUST:
- 24 Oreo cookies
- 4 tablespoons unsalted, melted butter
FOR THE MOUSSE:
- ⅔ cup granulated sugar
- ⅓ cup water
- 4 ounces finely chopped semisweet or bittersweet chocolate
- 4 egg yolks, room temperature
- ⅓ cup warm heavy whipping cream, plus 2 ½ cups, chilled
- ½ teaspoon fine sea salt, plus a pinch, separated
- 4 tablespoons unsalted butter, room temperature
- 2 teaspoons pure vanilla extract, separated
- ⅓ cup confectioners sugar
Instructions
TO MAKE THE CRUST:
- Grease a 9" springform pan. Place a round of parchment paper in the bottom of the pan, and cut strips to fit the sides. Set aside.
- Add the oreo cookies to a food processor fitted with a blade attachment. Attach the lid, and process until cookies have turned into crumbs. Drizzle in the melted butter through the feed tube, pulsing until evenly distributed and the crumbs have a damp appearance. See notes if you do not have a food processor.
- Add the cookies to the prepared pan and press down with your hands or the bottom of a glass to compact. Set the pan in the refrigerator while you make the mousse.
TO MAKE THE MOUSSE:
- Add the sugar and water to a small saucepan over medium-high heat and allow to come to a boil, stirring occasionally. As soon as the sugar has dissolved, remove from the heat. Set aside.
- Add the chocolate, egg yolks, ⅓ cup warmed cream, and a ½ teaspoon salt to a blender and blend for about 30 seconds.
- Remove the blender cap, NOT the whole lid, Stand back as far back from the blender as possible, and very slowly (and with caution -- hot sugar can cause burns), drizzle in the sugar syrup in a thin stream with the blender running on medium speed. Place a kitchen towel over the blender cap, and allow the blender to run for 3-4 minutes more.
- Add in the butter and 1 ½ teaspoon vanilla and briefly blend once more. Set aside until cooled completely and no longer warm to the touch, about 45 minutes. Once the mousse is cooled, transfer it to a large bowl and set aside.
- Add the chilled whipping cream to a medium-sized mixing bowl and use a handheld mixer on medium speed to whip the cream to stiff peaks. You could also use a stand mixer fitted with a whisk attachment.
- To make the sweetened whipped topping, transfer half of the whipped cream to a small mixing bowl, add the confectioner's sugar, a ½ teaspoon vanilla, and a pinch of salt. Mix on low or whisk until combined. Cover and refrigerate.
- Add the unsweetened whipped cream to the chocolate mixture in 4 separate additions, taking care to fold and not stir.
ASSEMBLE THE PIE:
- Pour the mousse over the crust, smooth over the top, and refrigerate for at least 4 hours, but preferably overnight.
- Once set, add the sweetened whipped cream topping, remove the pie from the springform pan, and discard of the parchment paper. Serve and enjoy!
Notes
Nutrition
Leave a Reply