Cold ingredients, a gentle hand, and this recipe are all you need to make spectacularly Flaky Pie Crust from scratch! This is a simple, straight-forward recipe for homemade pie crust. It uses a magical combination of both butter and shortening for stellar, easy-to-roll results, and makes not one but two crusts! Use both now or freeze one for later!
WHAT MAKES PIE CRUST FLAKY?
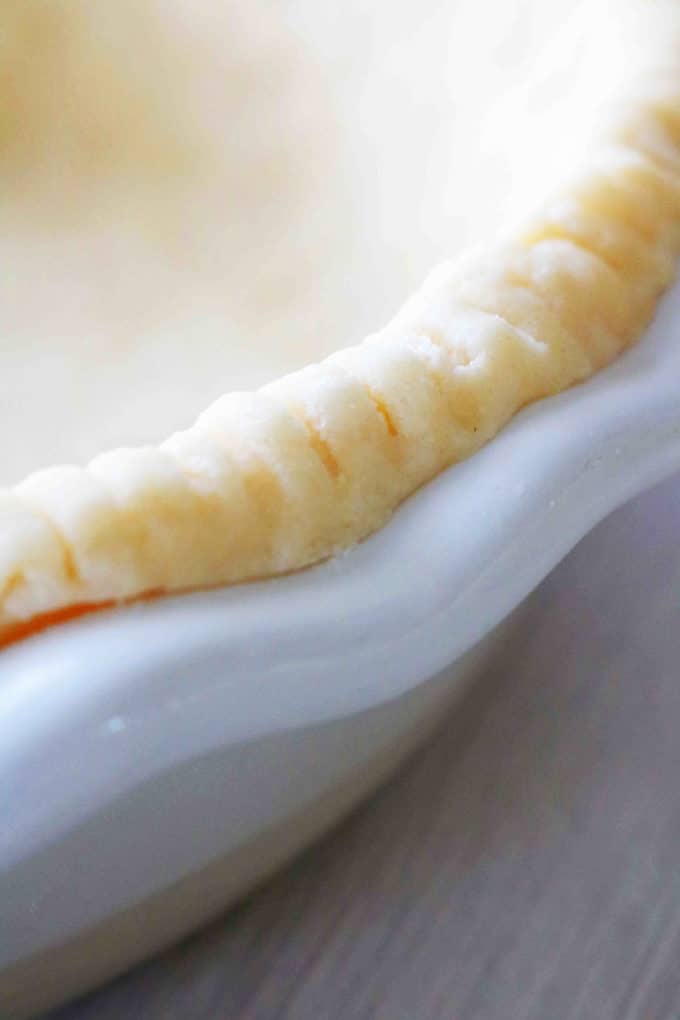
Cold fats and a gentle hand have absolutely everything to do with a good, solid Flaky Pie Crust. Whether you're incorporating butter, shortening, or (as we recommend) a combination of the two, they should be very cold going into the dry ingredients and the oven.
HOW COLD BUTTER AFFECTS YOUR CRUST
Cold butter is absolutely essential for making Flaky Pie Crust. Once the crust goes into the oven, the butter worked into said crust begins to steam. The steam from the butter creates air pockets that separate and puff up the layers of dough, which in turn, creates that flaky texture we know and love from a stand-out pie crust!
HANDLE WITH CARE
In addition to keeping things chill, you'll also need to handle the pie crust with care. Once the water hits the dough, gluten begins to form. Unfortunately, too much gluten will make a tough crust. What does this mean? Don't over stir the dough. As soon as the pie crust dough starts to come together, switch gears and very gently knead it until it all comes together in a ball.
FLAKY PIE CRUST INGREDIENTS
- Butter
- Shortening
- Flour
- Sugar (for sweet pies only)
- Salt
- Water
WHY YOU SHOULD USE SHORTENING AND BUTTER
There are many, many opinions out there regarding whether you should be making your pie crust with butter, shortening, or lard. Well, you can pretty much kiss the days of a lard pie crust goodbye, but butter and shortening? There's still a healthy debate going, and for good reason -- they're both pretty great for making pie crust.
Shortening makes pie crust easier to roll out, to better retain its shape, and promotes a soft and tender texture within the crust. Butter, on the other hand, adds flavor and is the secret behind a seriously flaky pie crust. For these reasons, we will use both.
HOW TO MAKE FLAKY PIE CRUST
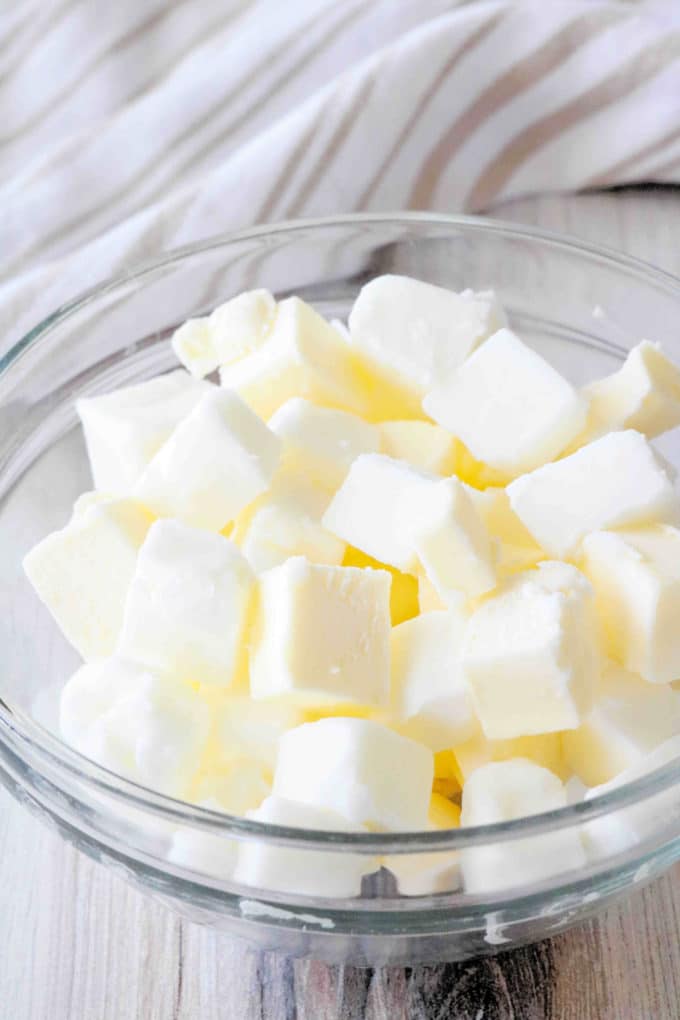
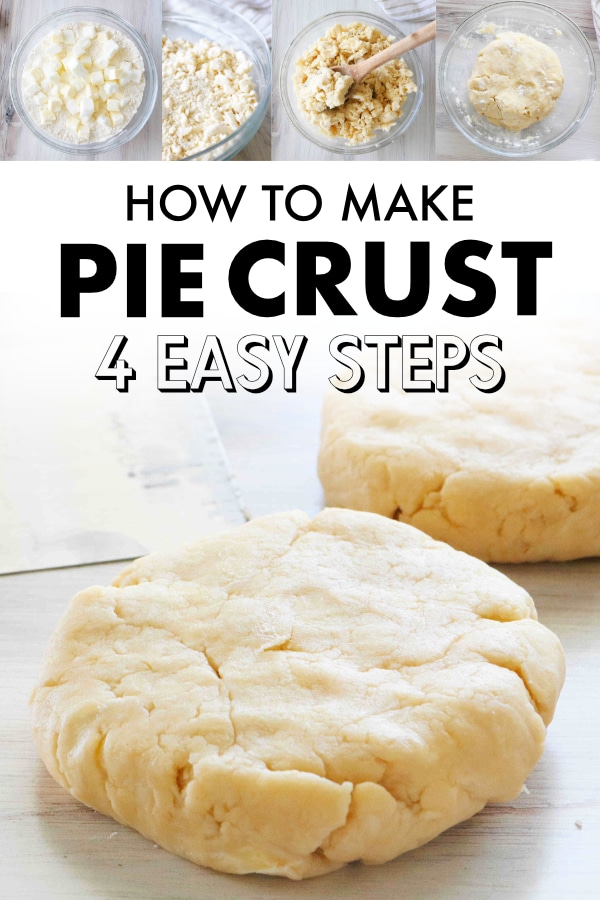
- Start With Cold Fats - Cold fats are key to a perfectly flaky pie crust. To make sure they stay cold while you're in the process of making your dough, place the cubed butter and shortening in the freezer for about 10-15 minutes before you begin.
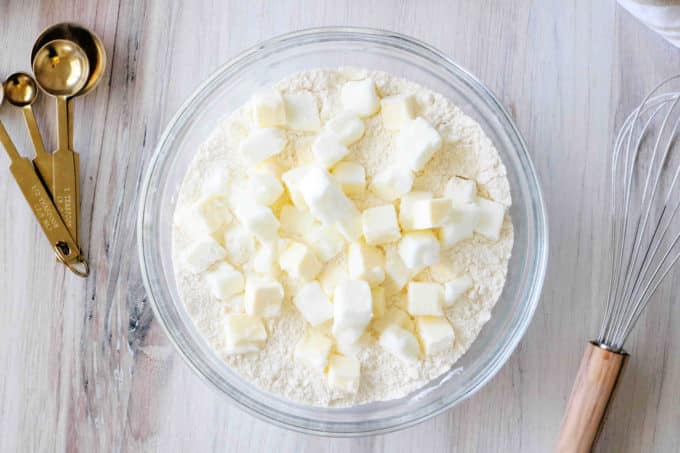
- Mix - Add flour, sugar (if using), and the salt to a large mixing bowl and whisk.
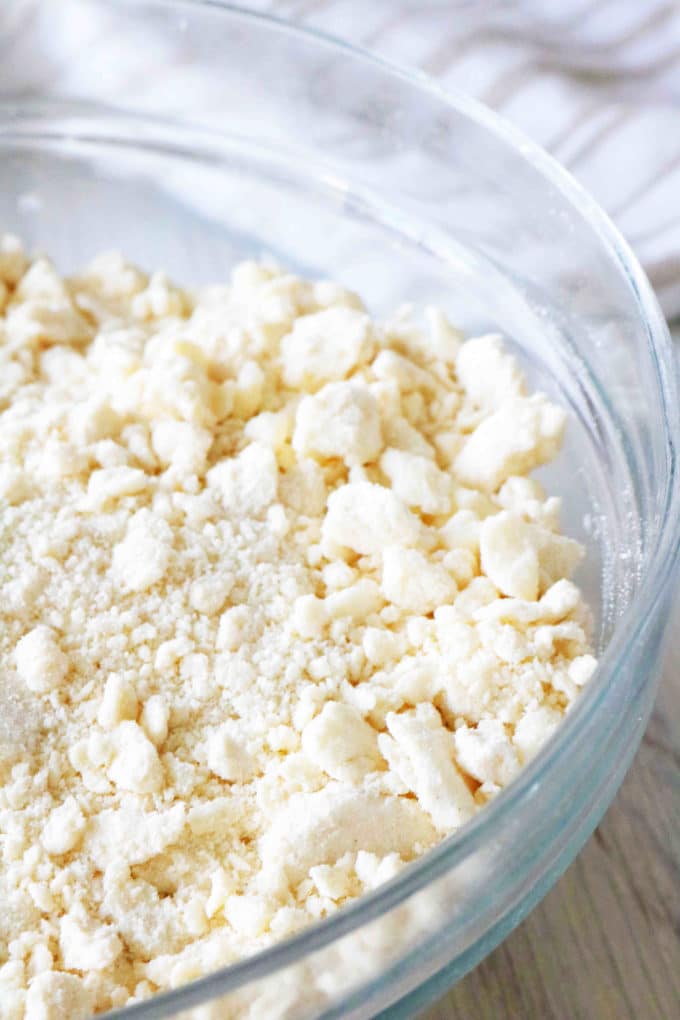
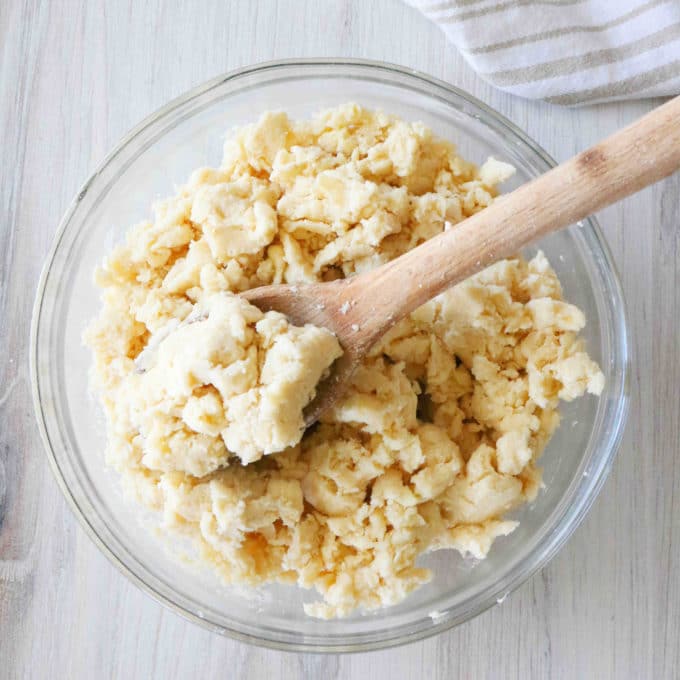
- Cut In Butter and Shortening - Add the butter and shortening cubes and use a pastry blender, a fork, or two knives to incorporate it into the dry mixture. Stop once the butter and shortening are worked in and resemble pea-sized clumps. Note, you can also make a perfectly Flaky Pie Crust in the food processor if you'd like technology to do the work for you!
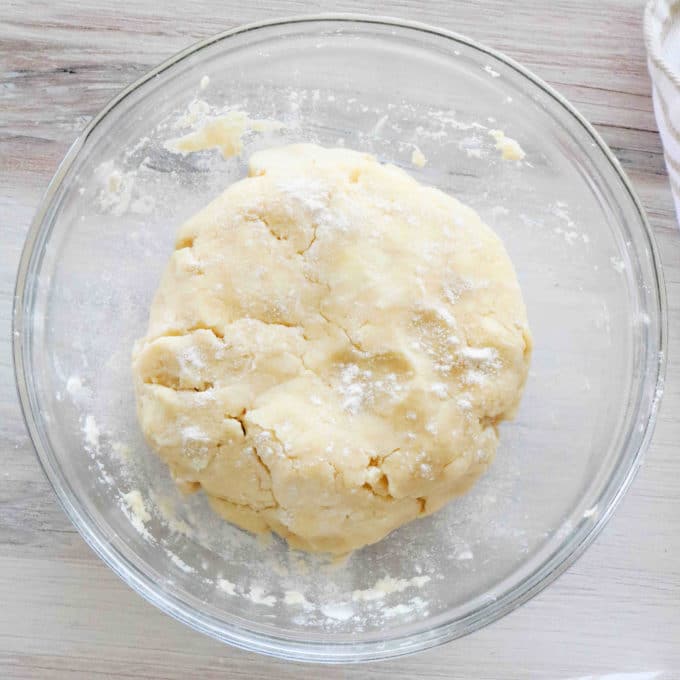
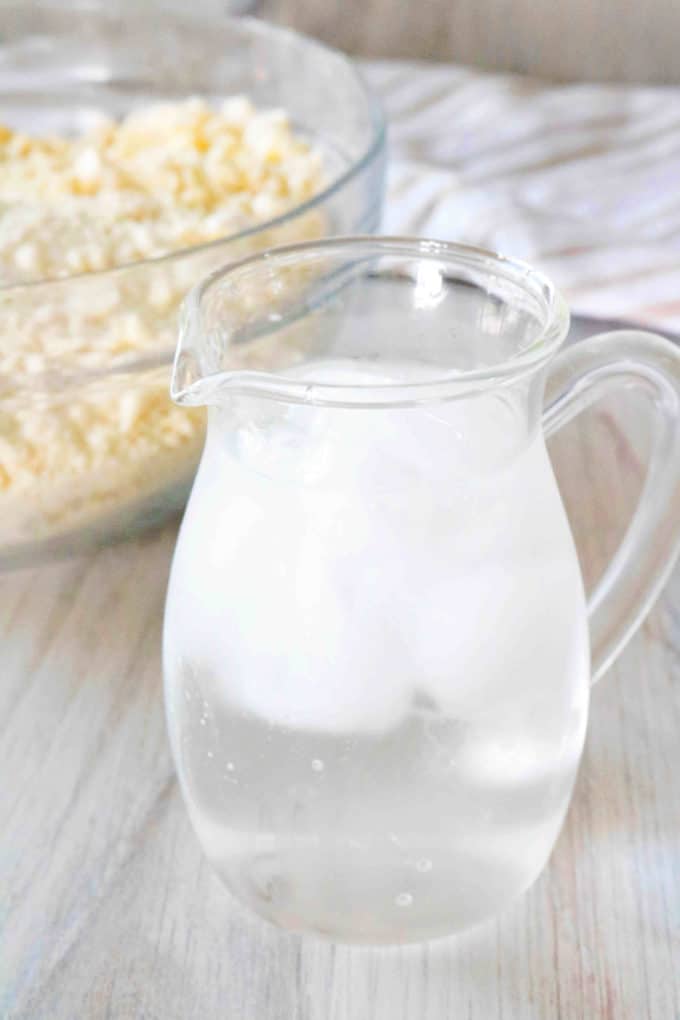
- Add Ice-Cold Water - Drizzle the water across the dough and stir until it is evenly distributed. You'll find a wooden spoon best suited for this job. Continue to stir until the dough comes together. Take care not to overwork the dough at this point. You may also use your hands to knead it all together gently, if necessary.
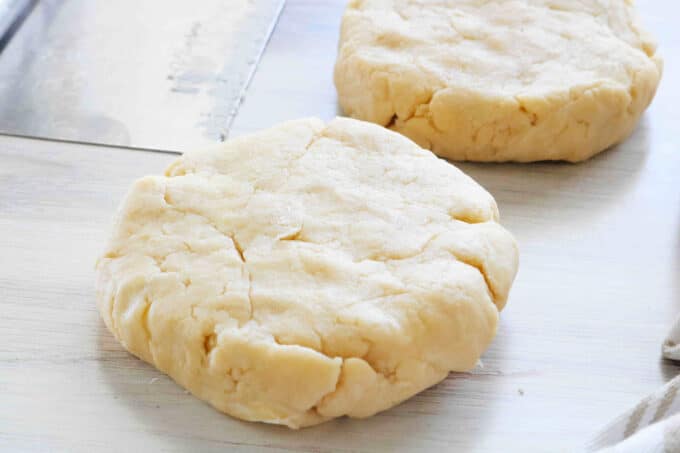
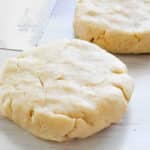
- Divide and Chill - Form the dough into a ball and transfer it to a floured work surface. Cut the dough ball in half using a knife or a pastry cutter, and form it into two flattened round disks. Wrap each disc in plastic wrap and place them in the refrigerator until chilled through, at least 2 hours.
HOW TO FREEZE HOMEMADE PIE DOUGH
Once your dough is patted into a disc and wrapped in plastic wrap, you can freeze it. To freeze the dough, simply place it in a freezer-safe, gallon-sized ziptop bag, remove the excess air, and seal. You could also wrap the discs in a few layers of aluminum foil. Use within three months for the best results.
To thaw, place in the refrigerator overnight.
And if you like a chocolate pie crust, we highly recommend our Oreo Pie Crust!
WHY IS MY PIE CRUST NOT FLAKY?
If your pie crust is not flaky, it's very likely that your fats (i.e. butter and shortening) were not cold enough as they were cut into the dry ingredients. If your fats started out chilled, but the water you added to the crust was not, that could also be the culprit. You want to take care that your water is ice-cold going into the dough. Cold ingredients are key for a flaky pie crust.
If your pie crust turns out dense, rather than light and flaky, it's very likely overworking the dough was the culprit. As soon as the water goes into the mix, gluten will begin to form. So, it is especially important from that point forward that you handle the dough gently and no more than necessary.
HOW TO ROLL OUT PIE CRUST
The part that confuses most people when it comes to rolling out pie crust is that it is supposed to be chilled, yet, when you try to roll out a cold, chilled dough (especially one made with butter), it's often difficult to work with and easily cracks.
It is indeed essential to chill the dough, however, if the dough is giving you trouble straight out of the refrigerator as you attempt to roll it out, you'll need to let it rest on the counter for at least 10 minutes, but possibly up to 20 minutes. Patience is key. You want the dough to feel soft, but not wet and sticky as the latter is even harder to roll.
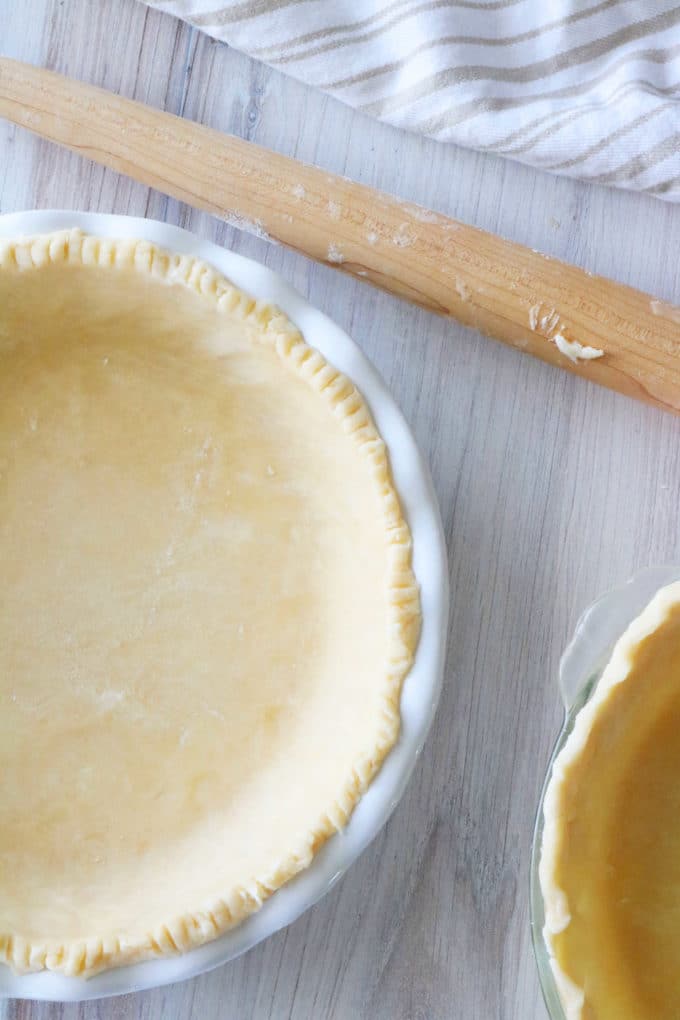
Once the dough is ready to roll, make sure your work surface, both sides the pastry disc, and the rolling pin have been dusted with flour.
Using a floured rolling pin, begin to roll from the center toward the edges, doing this in all directions. Lift and turn the dough as you go, adding flour as needed, so that the pastry does not end up sticking to your work surface.
Continue on with this process until the pie crust dough is about 12" in diameter and just under a ¼" thick. It's now ready for the pie dish!
HOW TO BAKE A SINGLE PIE CRUST
There are many pie recipes that call for the crust to be fully baked before adding a filling that requires no cooking at all. This is typically the case with pudding pies, like this decadent Stand-Up Chocolate Pudding pie. To fully bake a crust, you'll need to use a method called Blind Baking. It's referred to as Blind Baking because the pie crust is covered by sheets of aluminum foil and cannot be seen.
Once the crust is covered, pie weights (or any "bakable" weighted items) are added to the bottom of the pie dish. The aluminum foil keeps the crust from drying out and/or burning. The weight keeps the crust from bubbling up and makes for a smooth, perfectly shaped, fully baked pie shell.
If you love pies, check out our Pie Recipes next!
- Roll out the pie crust, transfer it to a pie dish, and crimp or fold the edges as desired.
- Gently cover the crust with aluminum foil (you'll likely need 2 sheets) and transfer it to the refrigerator to chill for at least 30 minutes.
- Preheat the oven to 425°F.
- Remove the crust from the refrigerator and add pie weights, dried beans, or uncooked rice on top of the foil.
- Bake for 15 minutes. Remove the crust from the oven and carefully remove the foil and pie weights.
- Then reduce the oven temperature to 350°F, transfer the crust back into the oven, and bake for 8-10 minutes more, just until the edges of the pie crust are tinging with a golden-brown hue. The crust should appear dry on the bottom and be fully baked at this point.
If you enjoy baking pie crusts and breads, our homemade potato hamburger buns are worth adding to your repertoire!
HOW TO BLIND BAKE PIE CRUST (FOR PARTIALLY COOKED CRUST)
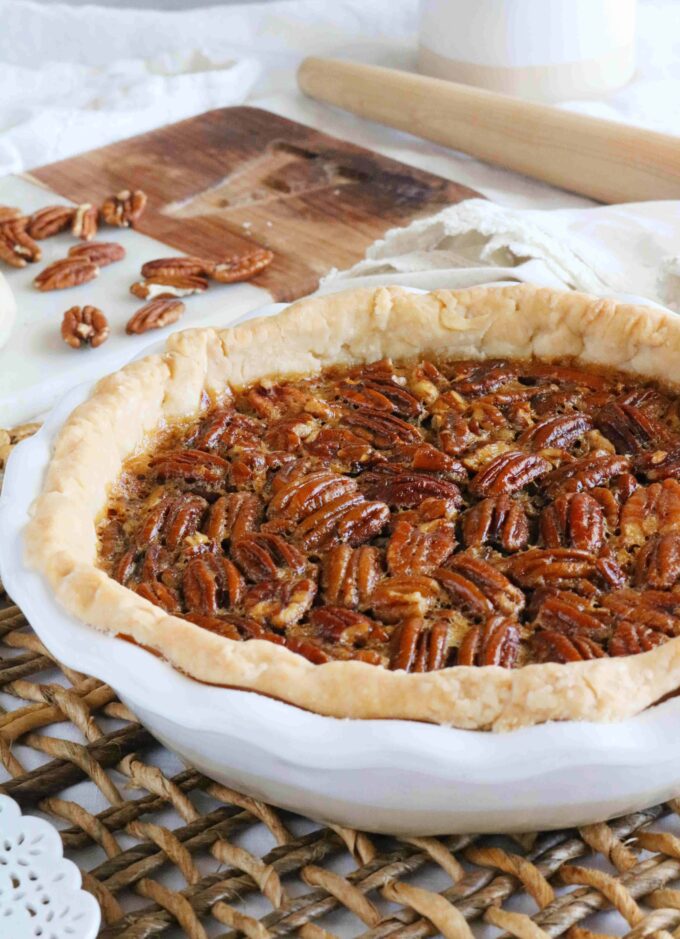
There will also be times in which you only need to partially bake a pie crust, which is most often the case with custard pies like Pecan Pie or Pumpkin Pie. Custard fillings are best baked at lower temperatures so to give the crust a head start, Blind Baking is again the answer!
- Roll out the pie crust, transfer it to a pie dish, and crimp or fold the edges as desired.
- Gently cover the crust with aluminum foil (you'll likely need 2 sheets) and transfer it to the refrigerator to chill for at least 30 minutes.
- Preheat the oven to 400°F.
- Remove the crust from the refrigerator and add pie weights, dried beans, or uncooked rice on top of the foil.
- Bake for 20 minutes. Remove the crust from the oven and carefully remove the foil and pie weights. Your crust should appear somewhat damp on the bottom and is now partially baked and ready for the filling.
- The filling bake time will vary per recipe.
HOW TO BAKE A DOUBLE CRUST PIE
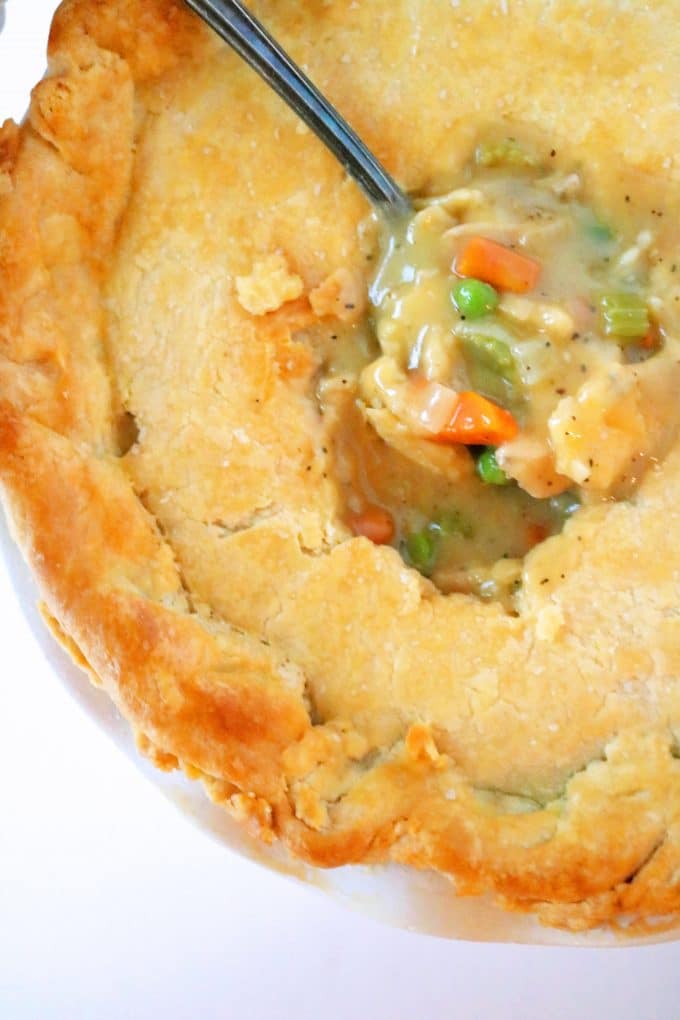
For those of us who can't get enough flaky pie crust on their plate, nothing beats a double-crust pie. These pies can be sweet, like our timeless Apple Pie or savory like the comfort food classic, Chicken Pot Pie! Whether your favorite pie filling falls on the sweet or savory side, it can be added to this double-crust pie recipe and baked according to the direction below:
- Preheat the oven to 400°F.
- Roll out the pie crust, transfer it to a pie dish, and add the filling.
- Roll out the second crust and center it over the top of the filling.
- Crimp the edges of the dough together and fold over decoratively, if desired.
- Make four vent holes in a circular pattern in the center of the pie using the tip of a knife.
- Bake for 15 minutes. Then reduce the oven temperature to 350°F and continue baking for an additional 45 minutes. You may need to add a pie shield after the 30-minute marker.
5 MORE BAKING RECIPES YOU’LL LOVE
- Chocolate Chess Pie
- Crawfish Pie
- Apple Crisp Pie
- Miniature Pigs In a Blanket (From Scratch)
- Blueberry Bars
Flaky Pie Crust
Ingredients
- 8 tablespoons cold unsalted butter, cut into tiny cubes
- 8 tablespoons cold shortening cut into tiny cubes
- 2 ¾ cups all-purpose flour
- 1 teaspoon fine sea salt
- 2 tablespoon granulated sugar (omit for savory dishes)
- ⅔ cup of ice-cold water
Instructions
- Place butter and shortening cubes in the freezer temporarily to harden.
- Add flour, granulated sugar (if using) and the salt to a large mixing bowl and whisk.
- Add the butter and shortening cubes and use a pastry blender, a fork, or two knives to incorporate it into the dry mixture. Stop once the fats are worked in and resemble pea-sized clumps.
- Drizzle the water across the dough and stir until evenly distributed. Continue to stir until the dough comes together. You may also use your hands to knead it all together gently, if necessary.
- Form the dough into a ball and transfer it to a floured work surface. Cut the dough ball in half using a knife or a pastry cutter. Form into two flattened round disks, wrap in plastic wrap and place in the refrigerator until chilled through, at least 2 hours.
HOW TO BAKE A SINGLE CRUST PIE:
- Roll out the pie crust, transfer it to a pie dish, and crimp or fold the edges as desired.
- Gently cover the crust with aluminum foil and transfer to the refrigerator to chill for at least 30 minutes.
- Preheat the oven to 425°F. Remove the crust from the refrigerator and add pie weights, dried beans, or uncooked rice on top of the foil.
- Bake for 15 minutes. Remove the crust from the oven and carefully remove the foil and pie weights.
- Reduce the oven temperature to 350°F, transfer the crust back into the oven, and bake for 8-10 minutes more. Allow to cool completely before adding your filling.
HOW TO (PARTIALLY BAKE) A SINGLE PIE CRUST:
- Roll out the pie crust, transfer it to a pie dish, and crimp or fold the edges as desired.
- Gently cover the crust with aluminum foil and transfer to the refrigerator to chill for at least 30 minutes.
- Preheat the oven to 400°F. Remove the crust from the refrigerator and add pie weights, dried beans, or uncooked rice on top of the foil. Bake for 20 minutes.
- Remove the crust from the oven and carefully remove the foil and pie weights. Your crust should appear somewhat damp on the bottom and is now partially baked. Allow to cool slightly before adding your filling.
- The filling bake time will vary per recipe.
HOW TO BAKE A DOUBLE-CRUST PIE
- Place a rack in the lower third of the oven and preheat the oven to 400°F.
- Roll out the pie crust, transfer it to a pie dish, and add the filling.
- Roll out the second crust and center it over the top of the filling.
- Crimp the edges of the dough together and fold over decoratively, if desired. Make four vent holes in a circular pattern in the center of the pie using the tip of a knife.
- Bake for 15 minutes. Then, reduce the oven temperature to 350°F and continue baking for an additional 45 minutes. You may need to add a pie shield after the 30-minute marker.
Notes
Nutrition
Tania | Fit Foodie Nutter says
What a great recipe! I have to try this one for my homemade pie for sure!
Krissy Allori says
This is a very good pie crust. Flaky and delicious. I also found it to be fairly easy to make.
Sarah says
Thank you for all of your tips! I’ve found that homemade pie dough is so hard to work with, so I appreciate all the extra info! I can’t wait to try the butter/shortening combo.
Kelley says
There is nothing better than a flaky pie crust! This recipe totally delivers!
Vicky says
Pie crust can be so tricky! Thank you for the detailed instructions!!
Faith V. says
I made this pie crust today because I had leftover filling from making your homemade chicken pot pie. I used butter and lard. Oh my goodness, it turned out SOOOOOOOOO well! Making homemade pie crust is really not as intimidating as I thought, and now I have the perfect recipe for all my sweet and savory pies!
Kelly Anthony says
I am SO HAPPY to hear that 🙂 Thank you for sharing!