
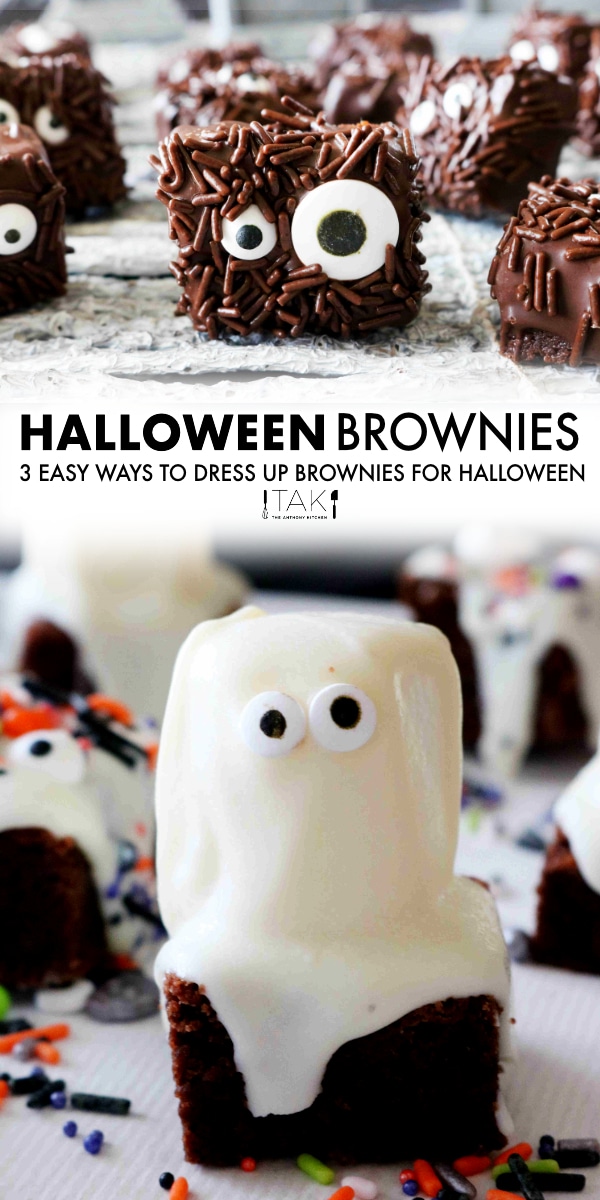

These homemade Halloween brownies are not only the best brownies you'll ever eat, they feed a crowd and make decorating fun! Three spooky, yet adorable, ways to dress up your brownies for Halloween straight-ahead!
Looking for more adorable, spooky ways to decorate Halloween desserts? Try Halloween Cake Pops (dressed up as ghosts, mummies, and little monsters), Halloween Rice Krispie Treats, and these Halloween Sugar Cookies suspended in air!

BROWNIES | THE BEST PARTY DESSERT
Brownies are a classic party dessert everyone adores, including the home cook who made them. Why? Well, because they're simple to make (yes, even from scratch), a bonafide crowd-pleaser, easy for guests to eat, and also, just downright delicious.
In fact, brownies just might be my favorite dessert, which is probably evident by this ever-building brownie collection.
From good ol' fashioned, classic chocolate brownies to brownies with cream cheese icing to s'mores brownies, all the way down to fudgy walnut brownie bites, we've got brownie recipes galore here, folks!
And now, just in time for the spookiest of holidays -- they're tiny, they're cute, they're 100% dressed to impress -- the most adorable brownie of them all...Halloween Brownies.
HOW TO MAKE HALLOWEEN BROWNIES
You can use either a brownie box mix for your Halloween Brownies, or you can make them from scratch!
This brownie recipe, in particular, is absolutely amazing and I highly, highly recommend you give made-from-scratch a chance! If you've never made homemade brownies before, you'll be shocked at just how easy this Halloween treat is to whip up!
1. PREP
Begin by preheating your oven to 350°F and you'll also want to have a 9 x 13" baking dish lined with either parchment paper or nonstick aluminum foil. This will help you to get those brownies out without losing any bits to the bottom of the pan!
Next, go ahead and get your butter melted and set it off to the side so that it can cool off bit before you add it to your wet ingredients. Now, it's time to move on to the dry ingredients!
2. MIX THE DRY INGREDIENTS
Add all-purpose flour, cocoa powder, baking powder, and salt to a medium-sized mixing bowl and whisk.
3. MIX THE WET INGREDIENTS
Then, for the wet ingredients you'll combine eggs, and egg yolk, granulated sugar, and vanilla in a large mixing bowl and whisk until well combined. Slowly stream in the melted and slightly cold butter, whisking all the while!
5. ADD DRY INGREDIENTS TO WET INGREDIENTS
Now, it's time to bring this Halloween brownie mix to completion! Add the dry ingredients and stir with a sturdy wooden spoon until all of the ingredients are evenly mixed together. If you'd like, at this point, feel free to add in a bonus cup of semi-sweet chocolate chips!
6. BAKE AND COOL
Transfer the brownie batter into the prepared pan, smooth over the top, and bake for 30 to 35 minutes. Once the brownies have finished baking, transfer the pan to a cooling rack and allow the brownies to cool completely.
For another festive brownie recipe, try our Peppermint Bark Brownies!
HALLOWEEN BROWNIES FOR A CROWD
This brownie recipe was made to party and easily feeds a crowd. Most brownie recipes begin in an 8x8" square baking dish, but, as mentioned above, these are made in a 9x13" casserole dish to ensure there are plenty of sweet bites to go around your Halloween party this year.

HOW TO CUT BROWNIES INTO EVEN SQUARES
To cut brownies into even squares, start by cutting the entire block in half, and from there, cut each half into halves, and so on. Note, you don't have to cut them into small squares. If you want bigger brownies, make fewer cuts.
After they're all cut up, it's time to decorate, and this my friends, is where all the fun begins.
Love a fun brownie recipe? Try our Oreo Brownies next!

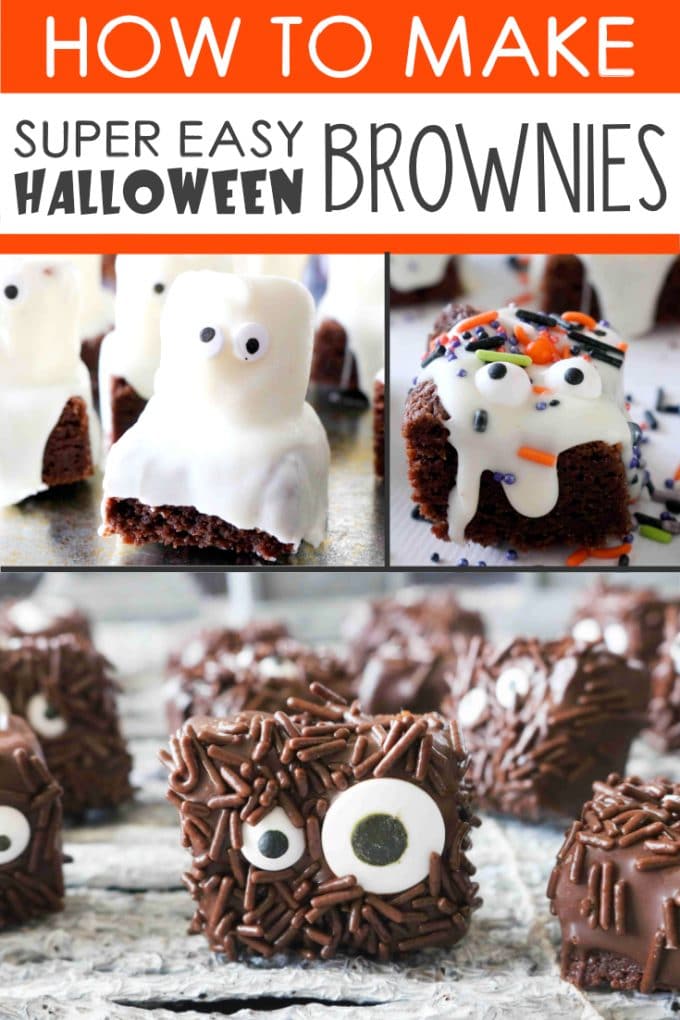
THREE HALLOWEEN BROWNIE DECORATING IDEAS
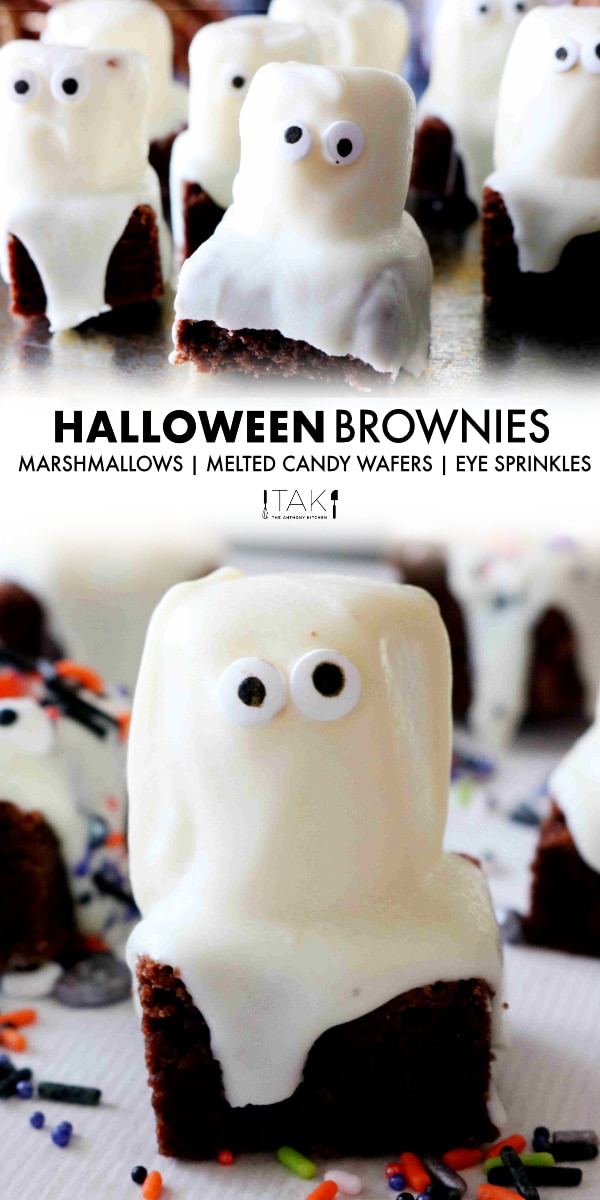
Dress them up as "Cousin It" Brownies, with candy eye decals and chocolate sprinkles made to look like hair, top them with a marshmallow and drape with white chocolate for a Ghost Brownies, or simply get yourself an assortment of colorful Halloween sprinkles and let the kiddos go to town on some festively decorated Spooky Halloween Brownies.
As different as all of these Halloween brownies look, they all have a few things in common: Sprinkles, candy eye decals (or large nonpareils if you can't find them), and melted chocolate...well, actually, melted wafers.
USE MELTING WAFERS FOR DECORATING
When it comes to melted chocolate, I often choose to work with melting wafers rather than actual chopped and melted down chocolate...especially for entertaining purposes.
Real, melted chocolate can be temperamental. Chocolate can spot or seize if you don't temper it just right so I skip the drama altogether and grab myself a package of Ghirardelli melting wafers.
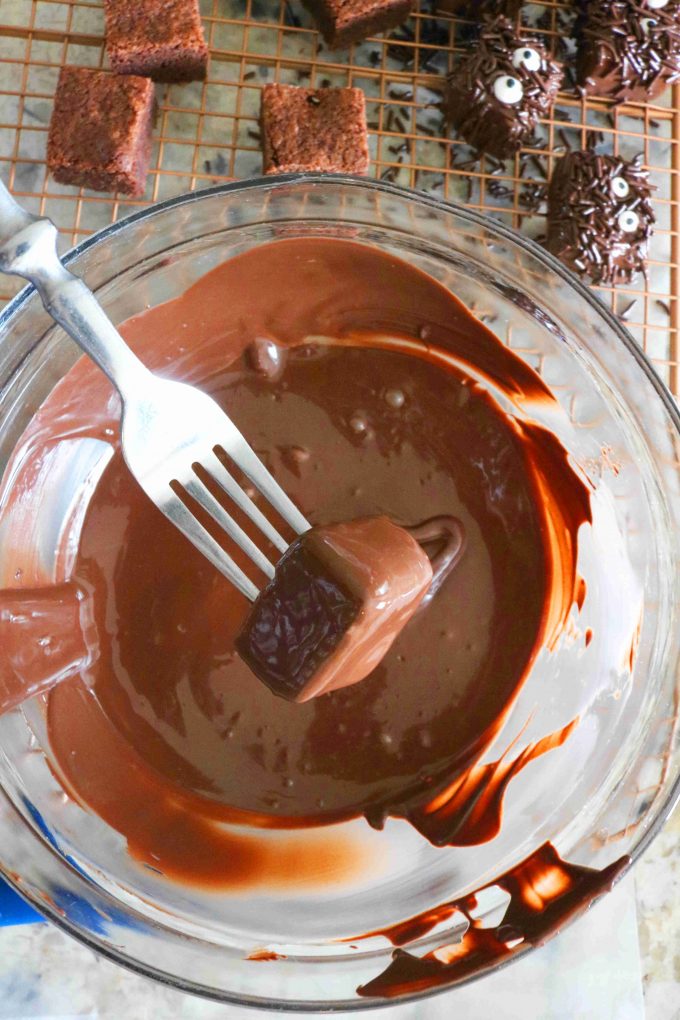
HOW TO DIP BROWNIES IN CHOCOLATE
To coat the brownies in chocolate, here's what you do:
- Melt the wafers according to package instructions in a bowl just large enough to house it.
- Have ready a work surface (such as a cooling rack placed over a sheet of wax paper to catch any chocolate drippings).
- Gently pierce brownies with a fork and submerge in chocolate, allowing any excess chocolate to drip off.
Once the brownies are dipped, it's time to finish the look, and quickly! Before the chocolate begins to set.
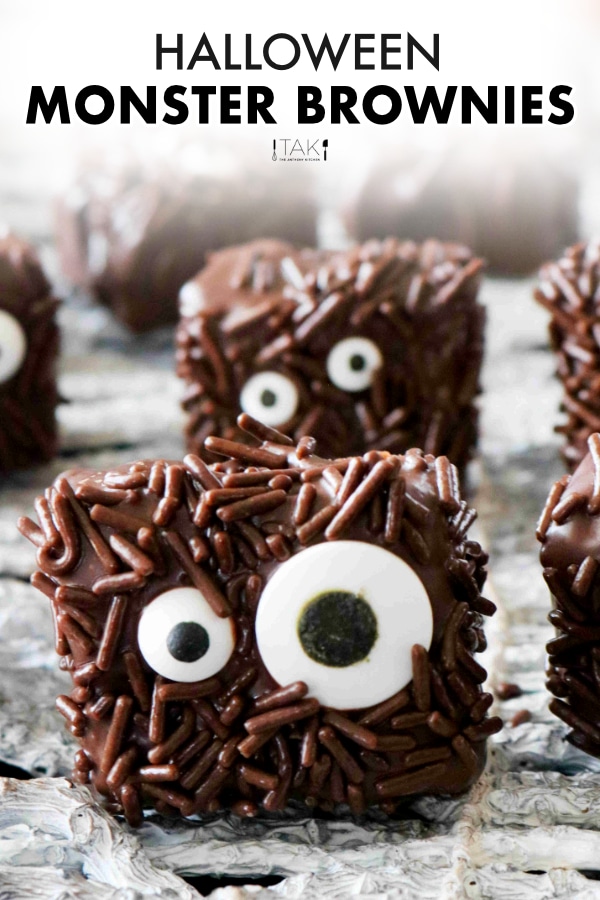
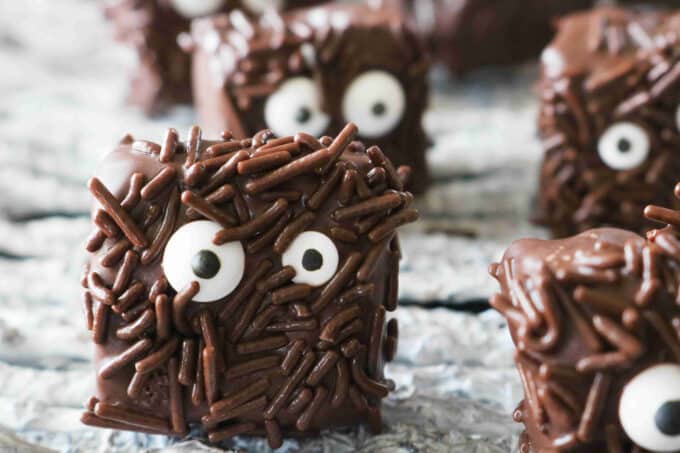
"COUSIN IT" HALLOWEEN BROWNIES
Let's start with the "Cousin It" Brownies, shall we? Inspired by the hairy cousin of the classic gothic comedy The Adam's Family, this little brownie is dressed in chocolate, head-to-toe, and he is absolutely adorable if you don't mind me saying so.
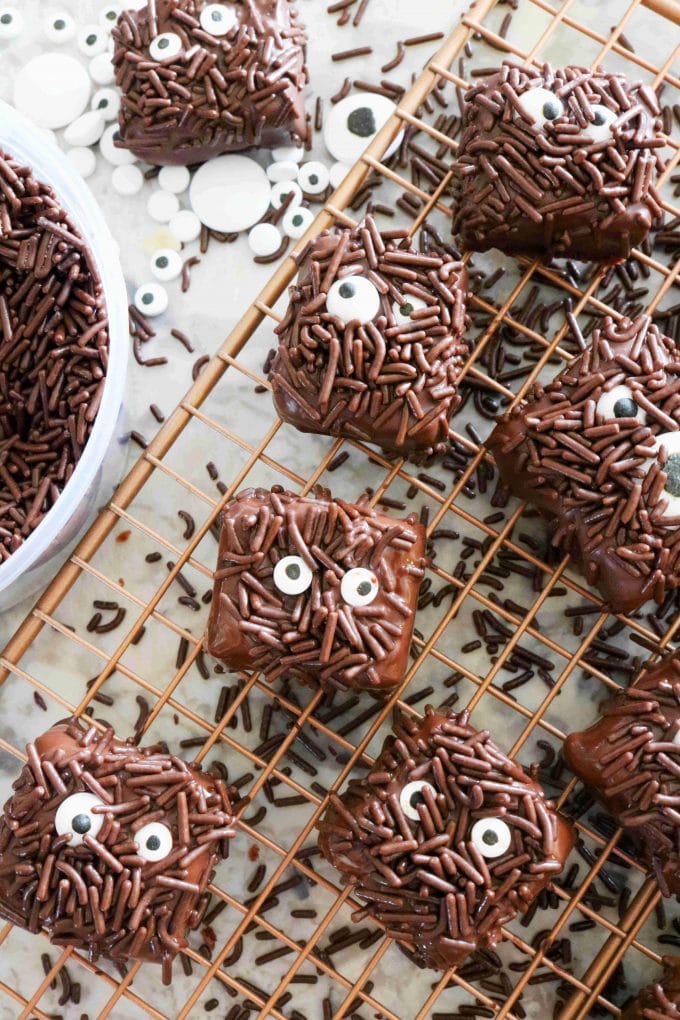
TO GET THE LOOK | "COUSIN IT" BROWNIES
- Dip in melted chocolate wafers.
- Add candy eye decals. I used candy eye decals in multiple sizes to make for a spookier look.
- Sprinkle generously with chocolate jimmie sprinkles.
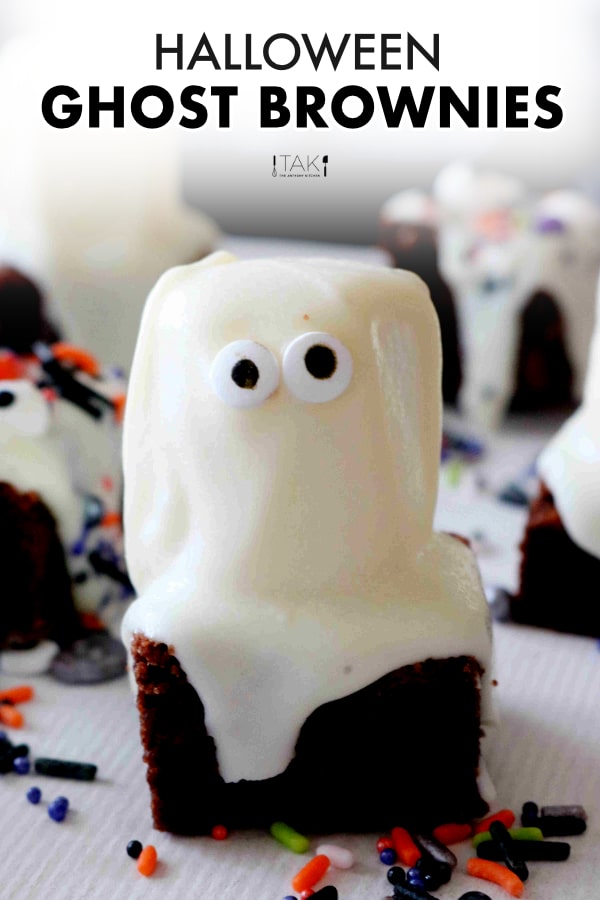
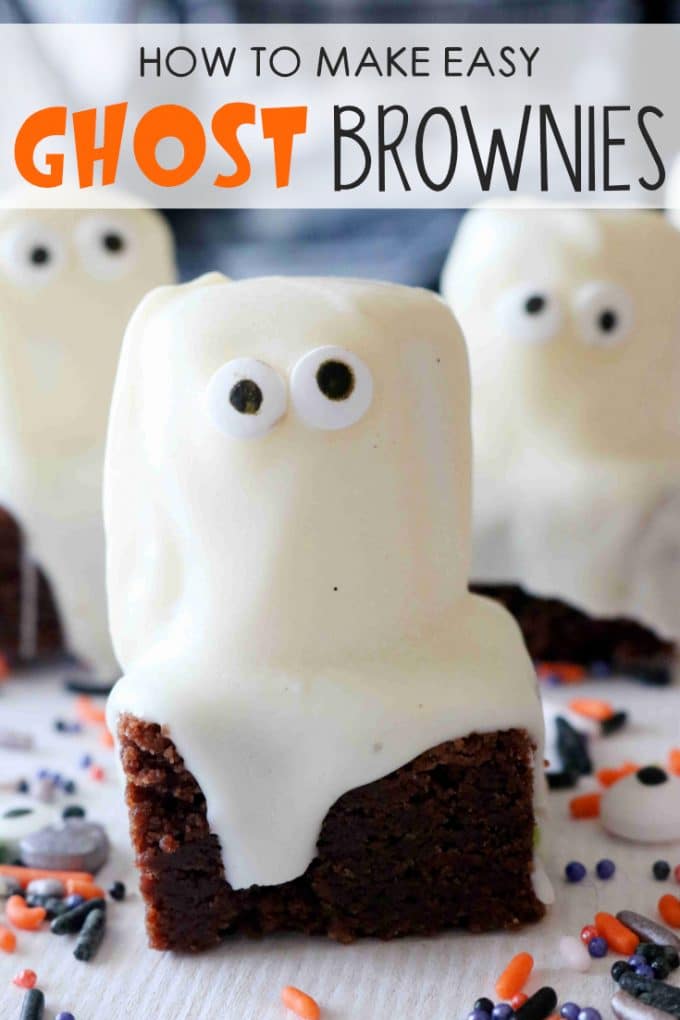
MARSHMALLOW GHOST BROWNIES
The "Cousin-It" Brownies are my favorite, as I am a chocoholic and these little guys satisfy every craving in the book. But as for the kiddos, the first brownie I saw their little hands reaching for were the marshmallow-topped Ghost Brownies.
These brownies are just as easy as the cousin it brownies, and they too begin with Ghirardelli Melting Wafers, only the white ones, not the dark chocolate.

GET THE LOOK | GHOST BROWNIES
- Spoon a scant amount of melted white chocolate over the top of the brownie.
- Place a marshmallow on top.
- Spoon a generous amount of white chocolate over the top of the marshmallow, using the back of the spoon to help it drape over the sides, and adding more chocolate as needed.
- Finish with candy eye decals or large, black nonpareils.
SPOOKY HALLOWEEN BROWNIES
Last up is the simplest of them all, and the ones I enjoy decorating the most with my kiddos, Spooky Halloween Brownies. For these brownies, you can use white or dark chocolate melting wafers, any assortment of festive Halloween sprinkles, candy eye decals, and maybe even some candy corn if you've got it on hand.
My kids adore the freedom this brownie gives them to let those creative juices flow, and they always come up with fun new ways to dress them up.
For another kid favorite try our cosmic brownies!

GET THE LOOK | SPOOKY BROWNIES
- Add either a generous spoonful of melted chocolate wafers over the brownie or dunk it completely in the chocolate.
- Add desired sprinkles.
If you'd like to add a little extra color to your spooky Halloween brownies, a few drops of liquid or gel food coloring into melted white chocolate wafers before dipping your brownies!
HALLOWEEN BROWNIES MAKE-AHEAD TIP
You truly can't go wrong with any one of these Halloween Brownie decorating ideas, because as we discussed earlier, you just can't go wrong with a brownie. Period.
But, these in particular, you really can't go wrong with! They're fun and festive, total crowd-pleasers, and they're freezer-friendly.
This means if you find yourself stranded for time (like many of us do come the holiday rush), you can plan ahead, make these at your earliest convenience, and pull them out of the freezer 30 minutes or so before it's time to serve.
6 MORE HALLOWEEN RECIPES YOU’LL LOVE
- Halloween Mummy Cupcakes
- Halloween Cake Pops
- Halloween Sugar Cookies
- Halloween Pretzels
- Halloween Rice Krispie Treats
- Monster Cyclops Cookies
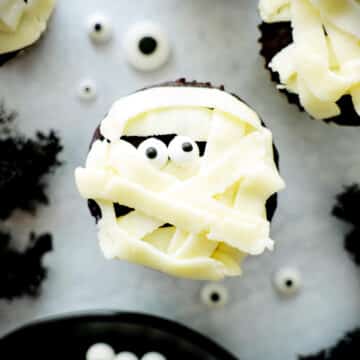
Mummy Cupcakes | Easy Halloween Recipe

Halloween Cake Pops

Easy Halloween Sugar Cookies with Royal Icing
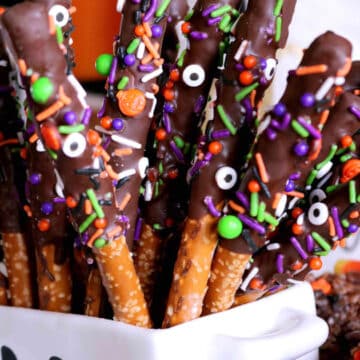
Halloween Treat | Chocolate-Covered Halloween Pretzels

Halloween Rice Krispie Treats

Easy Halloween Cookie

Halloween Brownies
Ingredients
For the Brownies:
- 1 ½ cup unsalted butter
- 1 ¾ cup all-purpose flour
- ⅔ cup cocoa powder
- 2 teaspoons baking powder
- 1 ½ teaspoon fine sea salt
- 2 large eggs
- 1 egg yolk
- 2 cups granulated sugar
- 2 teaspoons pure vanilla extract
For Decorating:
- 2 (10 ounce) packages Ghirardelli Melting Wafers (dark or white), melted according to package directions
- 2 (1 ounce) packages cand eye decals
- 1 package jet-puffed marshmallows (for Ghost Brownies only)
- ½ cup chocolate jimmie sprinkles (for "Cousin It" Brownies only)
- ½ cup assorted Halloween sprinkles (for Spooky Brownies only)
Instructions
- Preheat the oven to 350°F and have ready 9x13" baking dish, lined with either parchment paper or nonstick aluminum foil, leaving a bit of an overhang up the sides for easy removal.
- Melt the butter in a microwave-safe bowl or pitcher and set aside until ready to use.
- In a medium-sized mixing bowl, combine the flour, cocoa powder, baking powder, and salt. Whisk to combine.
- Add the eggs, the yolk, sugar, and vanilla to a large mixing bowl, and whisk until well-combined. Slowly stream in the melted butter, whisking all the while.
- Add the dry ingredients, and stir to combine with a sturdy wooden spoon.
- Add the batter to the prepared pan and smooth over the top. Bake for 30-35 minutes (or until cooked through), rotating the pan half-way through the cooking time. Remove from the oven and allow to cool in the pan 10 minutes. Then, carefully remove from the pan, transfer to a cooling rack and allow to cool completely.
- Cut the brownies into 1-1 ½" squares, and decorate as desired. See blog post if further instruction is needed.
- Allow chocolate to set, about 30 minutes, serve and enjoy!
Video
Nutrition


Claudia Lamascolo says
these are super creative and I know my kids will love these .. I just love Halloween fun foods like this!
Claire says
I've made a batch of these for the freezer so I can get ahead for halloween.
But I had to sneak a taste first and they are sooooo yummy.
I can't wait for my kids halloween party. They are going to love them!
Kelly Anthony says
Go, Claire!!! Thank you so much!! I love them too!
Julie Evink says
Oh.My.Goodness. My kids just saw this recipe and are dying to make them for Halloween! We are going to have so much fun!
Kelly Anthony says
Thank you, Julie! My little girls and their friends went crazy for them! They all wanted the ghosts 🙂 My favorite is the Cousin It...chocoholic 😉
Danielle says
These are adorable and look so tasty! I love your tip on cutting up the brownies as well - so helpful!
Natalie says
These brownies look so cute and perfect for upcoming Halloween! Can't wait to try this recipe!
Brian Jones says
What fun, I love the ghost version they look fantastic!
Kelly Anthony says
Thanks, Brian 🙂
Edyta at Eating European says
These are too cute. My kids would love them. I'm going to use some of your ideas for this year's Halloween 🙂
kankana Saxena says
I am definitely going to try those brownies with my kid. He will LOVE it and you made it sounds so easy and doable.
Kelly Anthony says
Thank you, Kankana!!!
Silpa | Silpa's kitchen says
Halloween brownies are looking so pretty. I wish i could do something like that. Thanks for the delicious brownies.
Kelly Anthony says
You are so welcome! Thanks, Silpa!
Bec says
These little "Cousin It" brownie bites are so flipping cute! I love how easy they are to make, too. Thanks for the great Halloween recipe.
Kelly Anthony says
Thank you so much, Bec 🙂
Amy Williams says
These are completely adorabley spooky! LOVE!
Kelly Anthony says
Thank you, Amy!
Jenni says
Oh my gosh, these are seriously the cutest ever! I definitely want to make them all this year! My girls will love them!
Macy. R says
Wow, this is an amazing brownie recipe! Being the crazy chocoholic (and Addams Family Fan) I am, I just had to make the Cousin It ones! My kids loved these!
Erin says
Fabulous recipes! The cousin IT brownies turned out great as did the ghost brownies. I recommend cutting the cousin IT brownies smaller than you normally would because there is so much chocolate with the coating and sprinkles. We also did just the ghost tops (skipped the brownies under). Fast and adorable. Thank you for the inspiration.
Kelly Anthony says
I just love that! Thank you, Erin!