
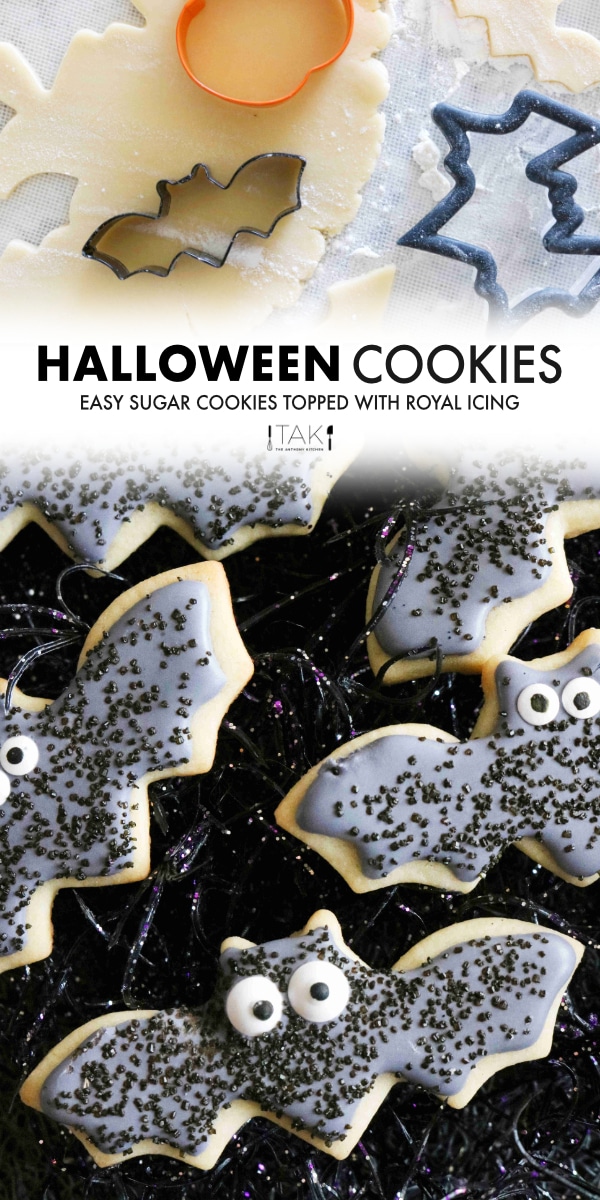
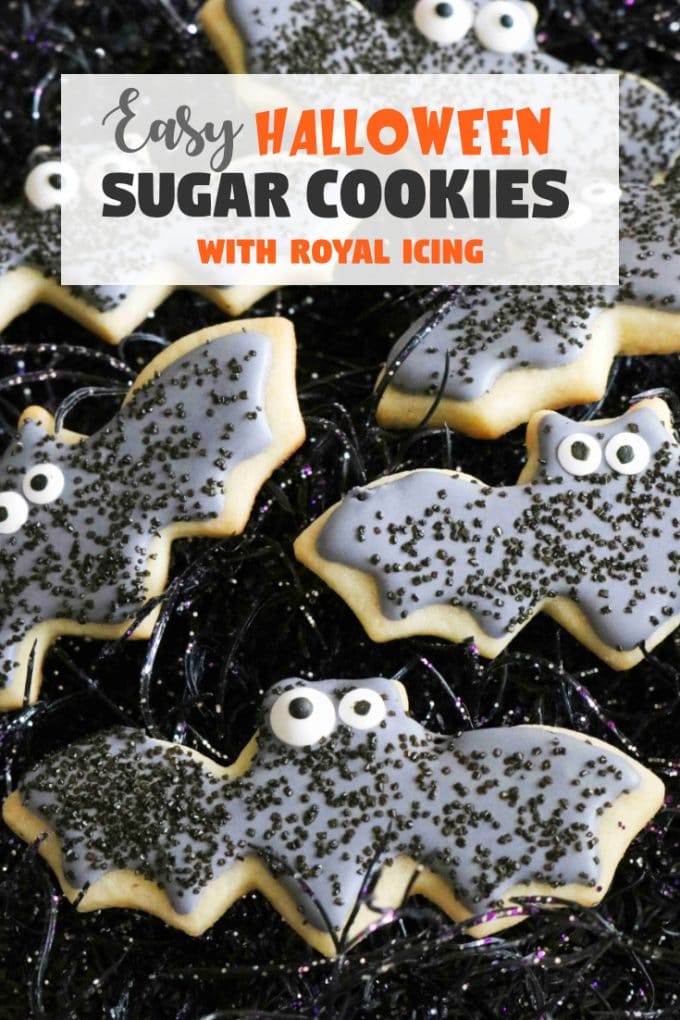
You don't need to be an expert in cookie decorating to make amazing Halloween Sugar Cookies!
DECORATIVE HALLOWEEN SUGAR COOKIES MADE SIMPLE
Want adorably spooky Halloween sugar cookies without all that complicated decorating? You've come to the right place.
When it comes to sugar cookies, I don't want to spend hours slaving over the tiniest royal icing detail, and unless baking is your business, I can only assume you don't want to either. The good news is, you can make some seriously cute Halloween sugar cookies this year and do your decorating all in one sitting.
In fact, my business used to be baking, and I still didn't want to slave over cookie decorating for hours on end.
Years ago, I made these Halloween sugar cookies for my very first Anthony Kitchen television debut. So I guess, technically, that makes these "As Seen on TV Cookies." With so much to whip up for an early morning segment, I needed a cookie favorite that was dressed to impress but wouldn't keep me up all night.
Here are my best tips and tricks for easy decorating when it comes to Halloween Sugar Cookies.
HALLOWEEN SUGAR COOKIE DECORATING MADE SIMPLE
Keeping cookie decorating easy and painless comes down to planning and simplifying.
CHILL OUT ON THE FOOD COLORING
If you're planning to work with royal icing, pick one icing color and stick with it. If you don't want to mess with royal icing at all, you could whip up a batch of this Easy Sugar Cookie Icing instead and just dip the face of the cookie in it. No piping required. It won't look as "neat," but it will still be 100% tasty.
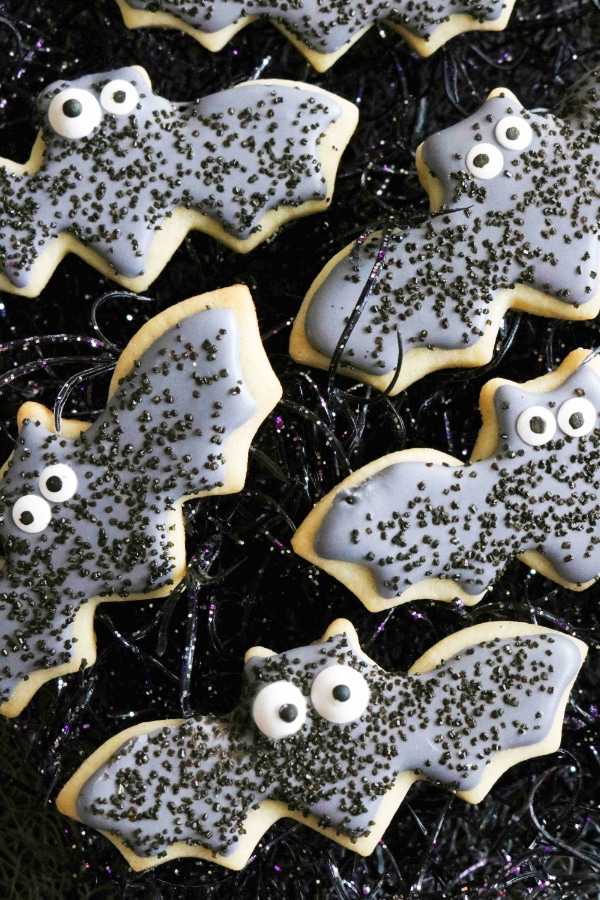
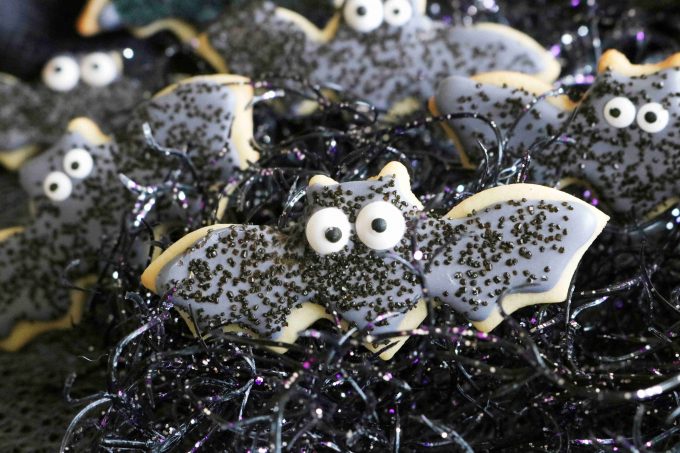
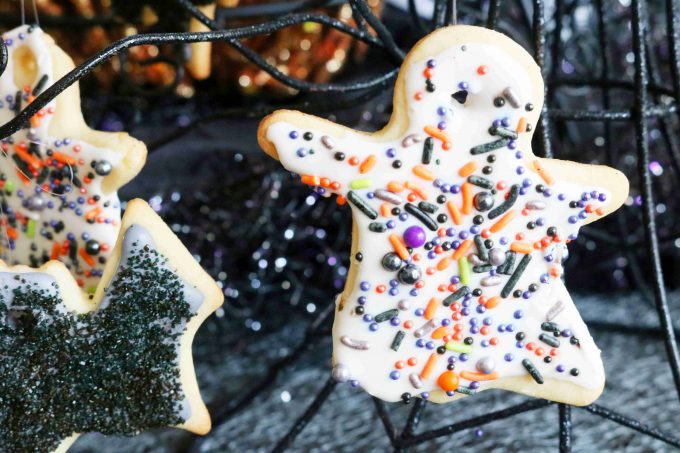
Use props like sprinkles and candy to add more color and detail to your cookies. It's the same plan of attack I use for my Christmas Sugar Cookies Made with Buttercream Icing, and it always works out just fine. With store-bought gems like candy eye decals and festive sprinkles, you'll find your decorative workload light and easy.
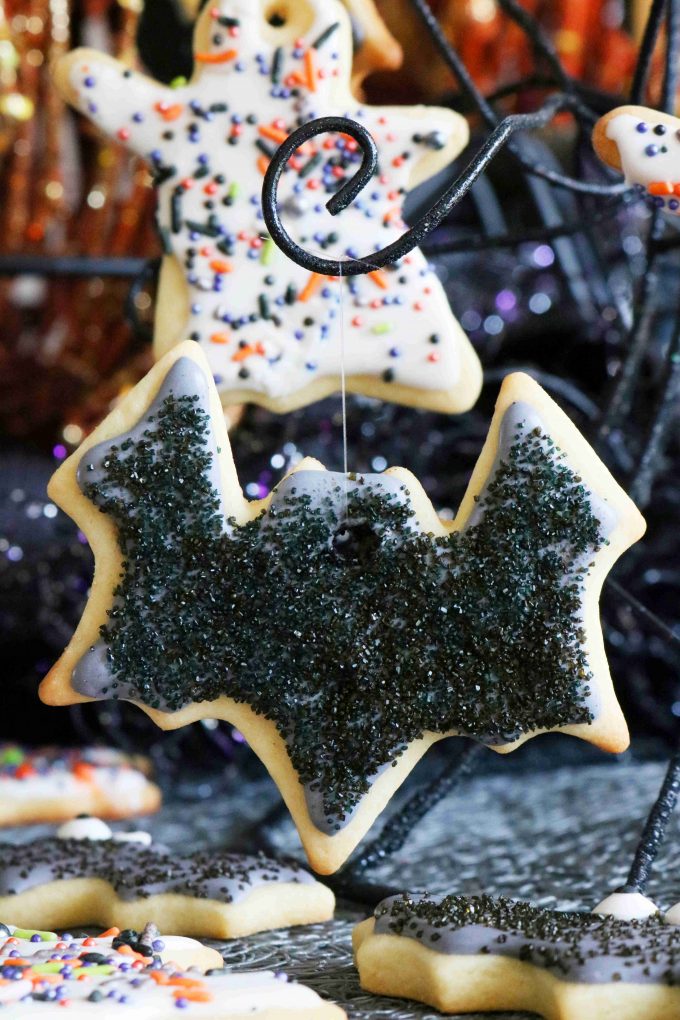
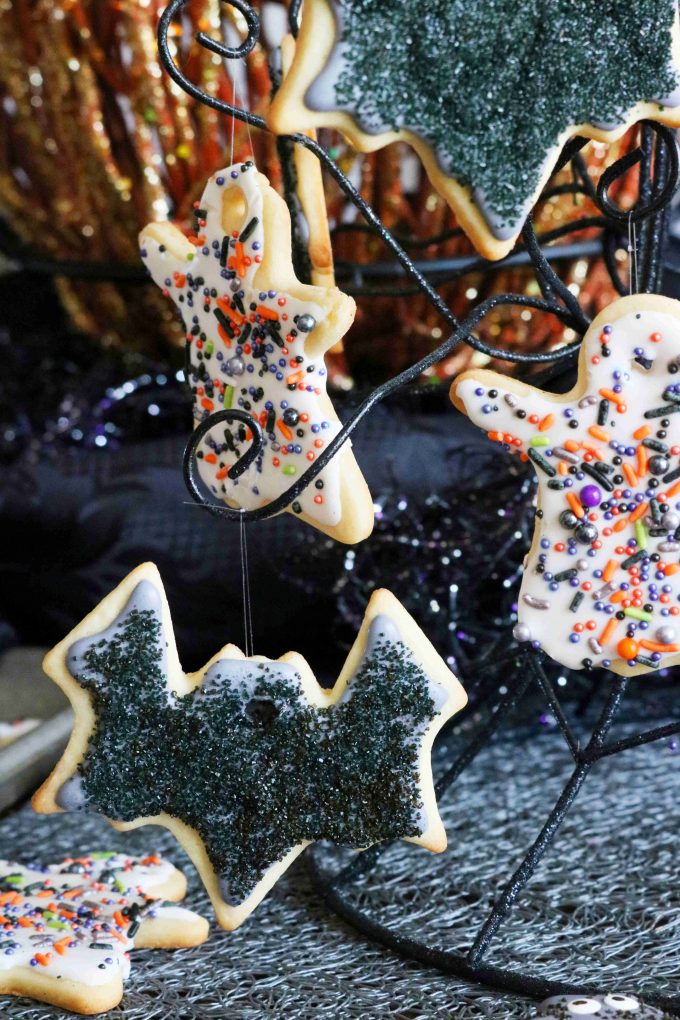
If I'm using two different cookie cutters, say a ghost and a bat, I simply divide the icing in half, and add black gel food coloring to one of the bowls for the bats, and leave the other white...cause ghosts are white...obviously. As you can imagine, I highly recommend using ghosts as one of your cookie shapes.
YOU DON'T HAVE TO USE ALL THE COOKIE CUTTERS

I know it's tempting to use all those adorable cookie cutters in the pack, but picking one (two max) will seriously cut back on the time you spend decorating. Now, I will say here, if you are planning to spend an afternoon in the kitchen with kids and make a day of decorating, by all means -- go nuts. Otherwise, make life easy on yourself, pick 1-2 to work with, and make your plan from there. Speaking of plans...
PLAN BEFORE YOU BUY
It's wise to put a little thought into the cookie-look you're going for before you head into your local craft store. Food gel coloring, decorative sprinkles, and cookie cutters can add up fast, so giving it a little thought beforehand not only makes your decorating process more organized (therefore much simpler), it also keeps your pocketbook happy.
I highly suggest purchasing candy eye decals for Halloween decorating. Take a look at these spooky Cyclops Cookies, precious Chocolate-Covered Halloween Pretzels, Halloween Rice Krispie Treats, or these Halloween Cocoa Treats and you'll see why.
Actually, I guess you could always just look down.

See? Candy eye decals? Totally adorbs.
WORKING WITH HOMEMADE SUGAR COOKIE DOUGH
Part of the reason I cut back on the decorating time is (A) it's just not a passion of mine, and (B) flavor is. I make my sugar cookie dough from scratch, and this makes for one seriously delicious cookie. If you plan to make sugar cookies from scratch, you can check out this article featuring helpful pro tips for working with sugar cookie dough.
Homemade sugar cookie dough comes together easy enough but requires some advanced planning. This means that when you are taking your serve time into consideration, you need to include the time it takes to (1) make the dough, (2) chill the dough, (3) roll out the dough, (4) bake the cookies and allow them to cool, (5) ice the cookies, (6) decorate and let them dry.
If that list overwhelms you, go ahead and grab yourself some store-bought sugar cookie dough. Just make sure it's the kind you can roll out, and not a cut/slice-and-bake version.
WORKING WITH ROYAL ICING
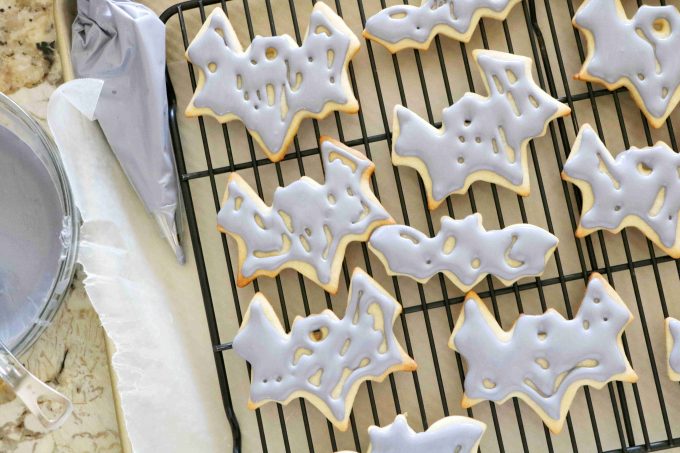
Being able to ice a sugar cookie with royal icing with ease really comes down to two things: The consistency of the icing and control over your piping bag. For more pro tips on working with royal icing, see this article on Royally Iced Sugar Cookies.
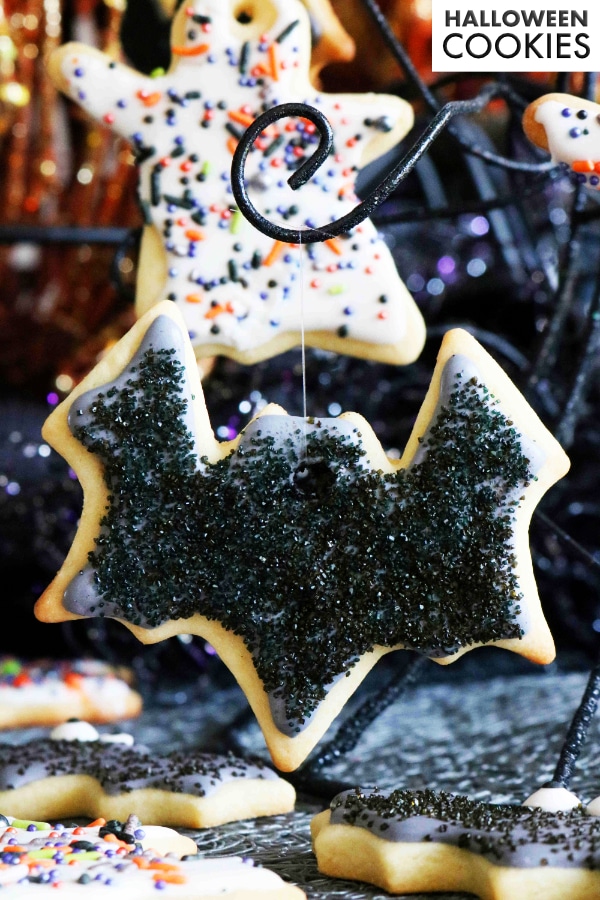
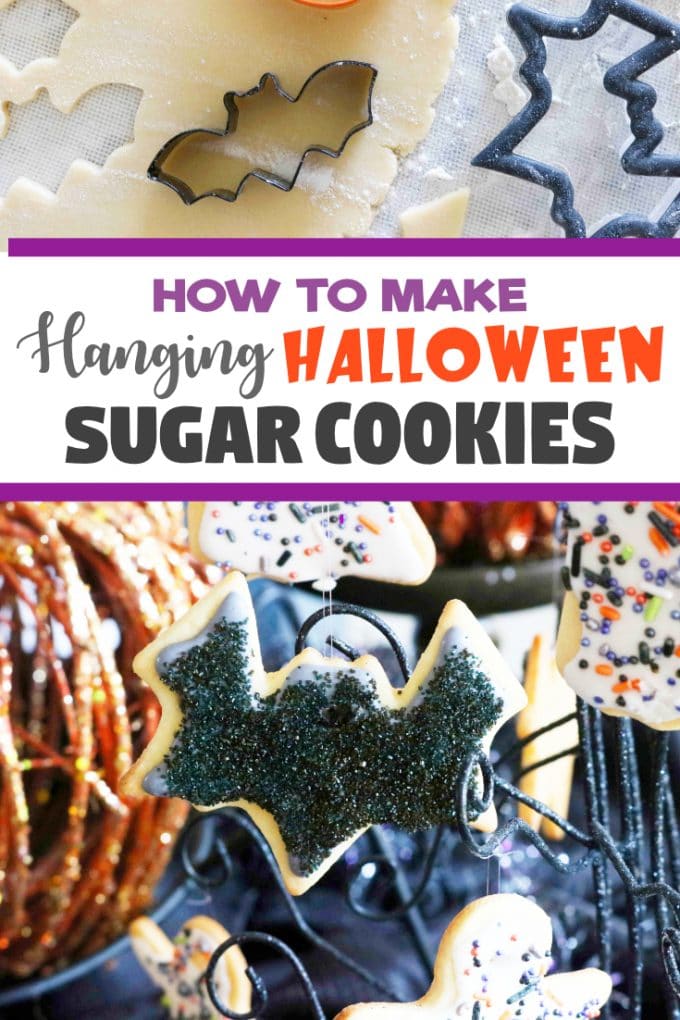
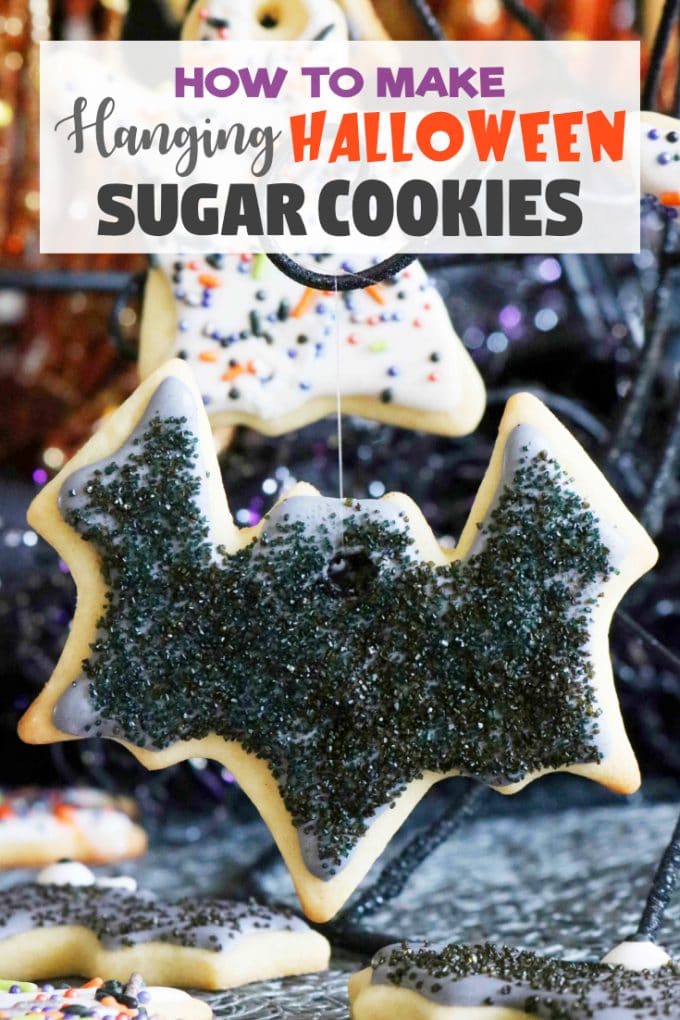
HANGING SUGAR COOKIES
In one of my favorite inspirational cookie books, there was an image of hanging sugar cookies, and I never forgot it! I knew it would be a show-stopper for television and especially at Halloween parties.
I hung my sugar cookies from a branchy decorative Halloween tree I got from Pier One. It was meant for ornaments, but decorative cookies are just as fitting, don't you think? The same concept can be done using ornament shaped or reindeer cookies at Christmas time.
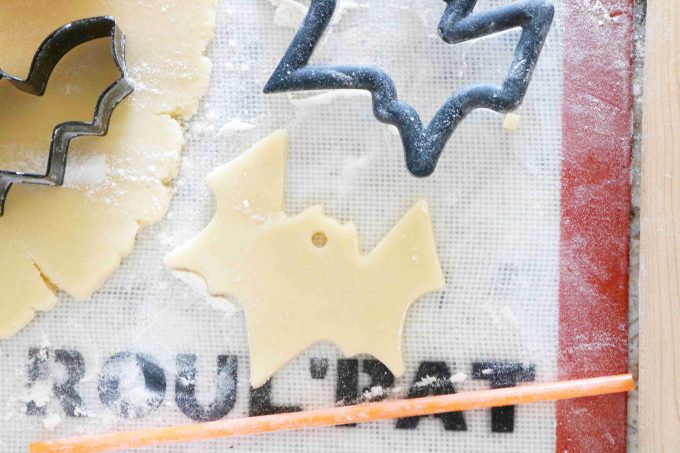
To hang sugar cookies, you first need to place a hole in the cookie. I used a drinking straw to puncture the hole and clear fishing string to tie it to the tree. Just be sure you tie a strong knot. You definitely don't want cookies falling from the tree and breaking.
When decorating hanging cookies, try to steer clear of the hole when piping on the royal icing. However, if icing does settle over the hole, you can always come in through the back of the cookie and carve out the icing with a toothpick or another food-safe tool that is skinny and sharp.
GET THE LOOK
For this particular set of cookies I used:
- Specific to the Hanging Cookies:
- Clear Fishing String or Ribbon
- One Drinking Straw
- 2 Piping Bags and 2 Round Tips
- Pumpkin and Ghost Cookie Cutter
- Black Gel Food Coloring
- Small Candy Eye Decals
- Silver, Black, and Purple Regular-Sized Nonpareils
- Silver, Black, and Orange Jumbo Nonpareils
- Orange, Green, Silver and Black Jimmies
- Black Sugar Sprinkles
These cookies are perfect for transporting thanks to that royal icing from one party to another, and they're also freezer friendly. In fact, my kids have been sneaking cookies from the freezer for almost a solid month now.
FREEZING TIPS FOR SUGAR COOKIES
Oh, yes. You can make Halloween Sugar Cookies up to a month (actually up to 3 months) in advance, making the holiday marathon just a little bit easier on you.
To freeze royally iced sugar cookies, lay them in a single layer inside a large, airtight, freezer-friendly container, and separate each layer with a sheet of wax paper. Once they're frozen, to save space, you can transfer them into a freezer-safe ziplock bag.
You're now well-equipped with a Halloween cookie dressed to impress this holiday. One you didn't have to spend all day decorating.
Before you go, be sure to check out our collection of Halloween Party Food Recipes for a quick look at more cute (yet slightly spooky) Halloween recipes to add to your Halloween table spread, and please, enjoy! You absolutely won't want to miss a view of these Spooky Cake Pops. They're especially simple to make and you can choose from three Halloween Cake Pop decorating ideas — Ghosts, Mummies, or Little Monsters!


Halloween Sugar Cookies
Ingredients
For the Cookies:
- 2 ¾ cups all-purpose flour, plus extra for rolling
- 1 teaspoon baking powder
- 1 teaspoon fine sea salt
- 1 cup unsalted butter, room temperature
- 1 ¼ cup granulated sugar
- 1 large egg
- 3 tablespoons half and half
- 1 teaspoon pure vanilla extract
- 1 teaspoon pure almond extract
For the Royal Icing:
- 3 cups powdered sugar
- 2 tablespoons meringue powder (found at specialty craft stores)
- 3 ounces warm water
- 1 teaspoon pure almond extract
For Decorating the Cookies:
- Food coloring
- Jimmies
- Small or jumbo nonpareils (round sprinkle balls)
- Small candy eye decals
Instructions
- In a mixing bowl, whisk together flour, baking powder and salt. Set aside until ready to use.
- In the bowl of a stand mixer fitted with a paddle attachment, beat the butter on medium-high speed for 1-2 minutes. Alternatively, use a large mixing bowl and a handheld mixer. Add the sugar and beat on medium-high speed once again until light and fluffy, about 3 minutes. Scrape down the sides of the bowl and mix briefly once again.
- Add the egg and mix on medium speed until well-incorporated. Add the half and half, along with both the vanilla and almond extract and mix once more.
- Add the flour in 3 separate additions, mixing on low after each addition. Do not over-mix. Divide the dough into two rounds and lay each atop a sheet of plastic wrap. Flatten into a disk shape, wrap and refrigerate until chilled, no less than 1 hour. The dough can be made a day in advance.
- Preheat the oven to 350° and have ready cookie sheets lined with either parchment paper or a Silpat.
- One at a time, lay the disks atop a large floured work surface. Lightly flour each side of the dough round. Begin rolling, from the middle outward in each direction, shifting the dough slightly after each roll to avoid sticking. Do this until the dough is a ¼” in thickness. Cut out dough into desired shapes.
- Transfer the cookies to the prepared cookie sheets, spacing them at least 1 inch apart. Bake until the outer edges are just tinged with golden-brown, about 8-10 minutes. Remove from the oven and allow to cool completely before icing.
For the Royal Icing:
- Have ready a piping bag fitted with a round tip.
- In the bowl of a stand mixer, combine powdered sugar, meringue powder, water and extract. Begin mixing on low until powdered sugar has absorbed the liquid ingredients, then increase speed to high. Alternatively, use a large mixing bowl and a handheld mixer. Mix for 2-3 minutes or until the icing is the consistency similar to toothpaste.
- To ensure the icing is the right consistency, test it by allowing icing to drip from the paddle attachment or beaters. It should take about 30 seconds before the fallen icing loses its shape and melds into the rest of the icing.
- If coloring the icing, add the food coloring now.
- To apply the icing to the cookie, pipe a line of icing about an eighth of an inch from the edge of the cookie. This is also called outlining. Do not pipe directly on the edge. Then, pipe in a tight and compact zig-zag pattern to fill the inside of the cookie. This is also called flooding.
- Decorate with sprinkles and decals while the icing is still wet. Set aside and allow to set for at least 4 hours, but preferably overnight.
Nutrition
5 MORE FROSTED DESSERTS YOU'LL LOVE
- Royally Iced Sugar Cookies are beautiful and perfect for gifting as they can be stacked and easily transported. This recipe makes easy work of making royal icing, along with detailed tips for icing your cookies.
- Painted Sugar Cookies with Royal Icing are fun and easy to decorate. Pull out the paint brushes and get creative with these sweet (and beautiful) treats!
- Egg Hunt Blondies are an adorable Easter dessert featuring a homemade buttercream frosting made to look like Easter grass and M&M candies made to look like eggs for an egg hunt!
- Homemade Brownies with Strawberry Cream Cheese Icing and Fresh Berries features a light-as-air, whipped strawberry cream cheese frosting, topped with an assortment of beautiful berries. This dessert makes a seriously impressive presentation!
- Christmas Sugar Cookies with Sugar Cookie Icing are as beautiful as they are tasty! Simple, homemade sugar cookies with an easy buttercream frosting for cookies. Plus, how to ice tree and wreath cookies to look like grass.

Iryna says
How fun are these cookies! And you did a great job on the royal icing, so neat! Kids will love such treats for halloween.
Tisha says
Halloween is my favorite holiday! I can't wait to make these with my kiddo!!
Bethany | A Simple Palate says
How CUTE! I love these cookies. Always looking for fun Halloween recipes 🙂
Kelly Anthony says
Thank you, Bethany!
Krissy Allori says
These are such delicious and cute Halloween cookies! I will have to make them when Halloween gets closer!
Kelly Anthony says
Thank you, Krissy!!
Natalie says
These cookies are adorable! Saving this recipe for our Halloween party 🙂
Ginny says
These are the cutest little Halloween Cookies. A great way to enjoy sugar cookies.
Kelly Anthony says
Thank you so much! We love them 🙂
Jess says
I would love to make these for a my daughters class for Halloween but they are nut free. Is there a substitute for the almond or can I omit it entirely?
Kelly Anthony says
I'm sorry I'm seeing this so late! But yes, almond extract could be swapped for vanilla or left out!